This weekend, Popular Science will be holding catapult competitions at World Maker Faire. We’ll guide attendees through building their own miniature siege weapons from wooden dowels and rubber bands. Then we’ll pit you against each other in target practice, with the winners taking home PopSci swag.
Not everyone can join us in New York, but anyone can build the same type of tabletop catapult by following these instructions (based on this project). Feel free to modify the steps if you see the opportunity to make a stronger structure.
WARNING: The wooden dowels can jump all over the place. Don’t poke your eye out!
Stats
- Time: Less than an hour
- Cost: $15
- Difficulty: Easy
Materials

- 12 wooden dowels, 12″ long by ⅜” diameter
- ~40 rubber bands, various sizes
- Spoon or stemmed plastic cup
- Ping-pong balls
- A couple moderately heavy items for weight (optional)
Instructions

Put two dowels together in a capital-T-shape. The leg of this T will become the catapult’s throwing arm, so make sure it can turn freely around the dowel.

Grab three other dowels to finish framing the square base. Attach two to the top of the T (from Step 1); then use the third to connect them, forming a square.

At each corner of the base, affix a dowel (four total) that sticks up vertically. It’s okay if they wave around a little—the next few steps will stabilize the structure.

Connect a horizontal dowel to the tops of the two vertical dowels on either side of the throwing arm. Then, between the two vertical dowels on the other side, connect a horizontal dowel a couple inches below their tops.

Lean together the structures you created in Step 4 to form a triangle, and connect their tops with rubber bands. Weigh down the square base with your moderately heavy items (optional).

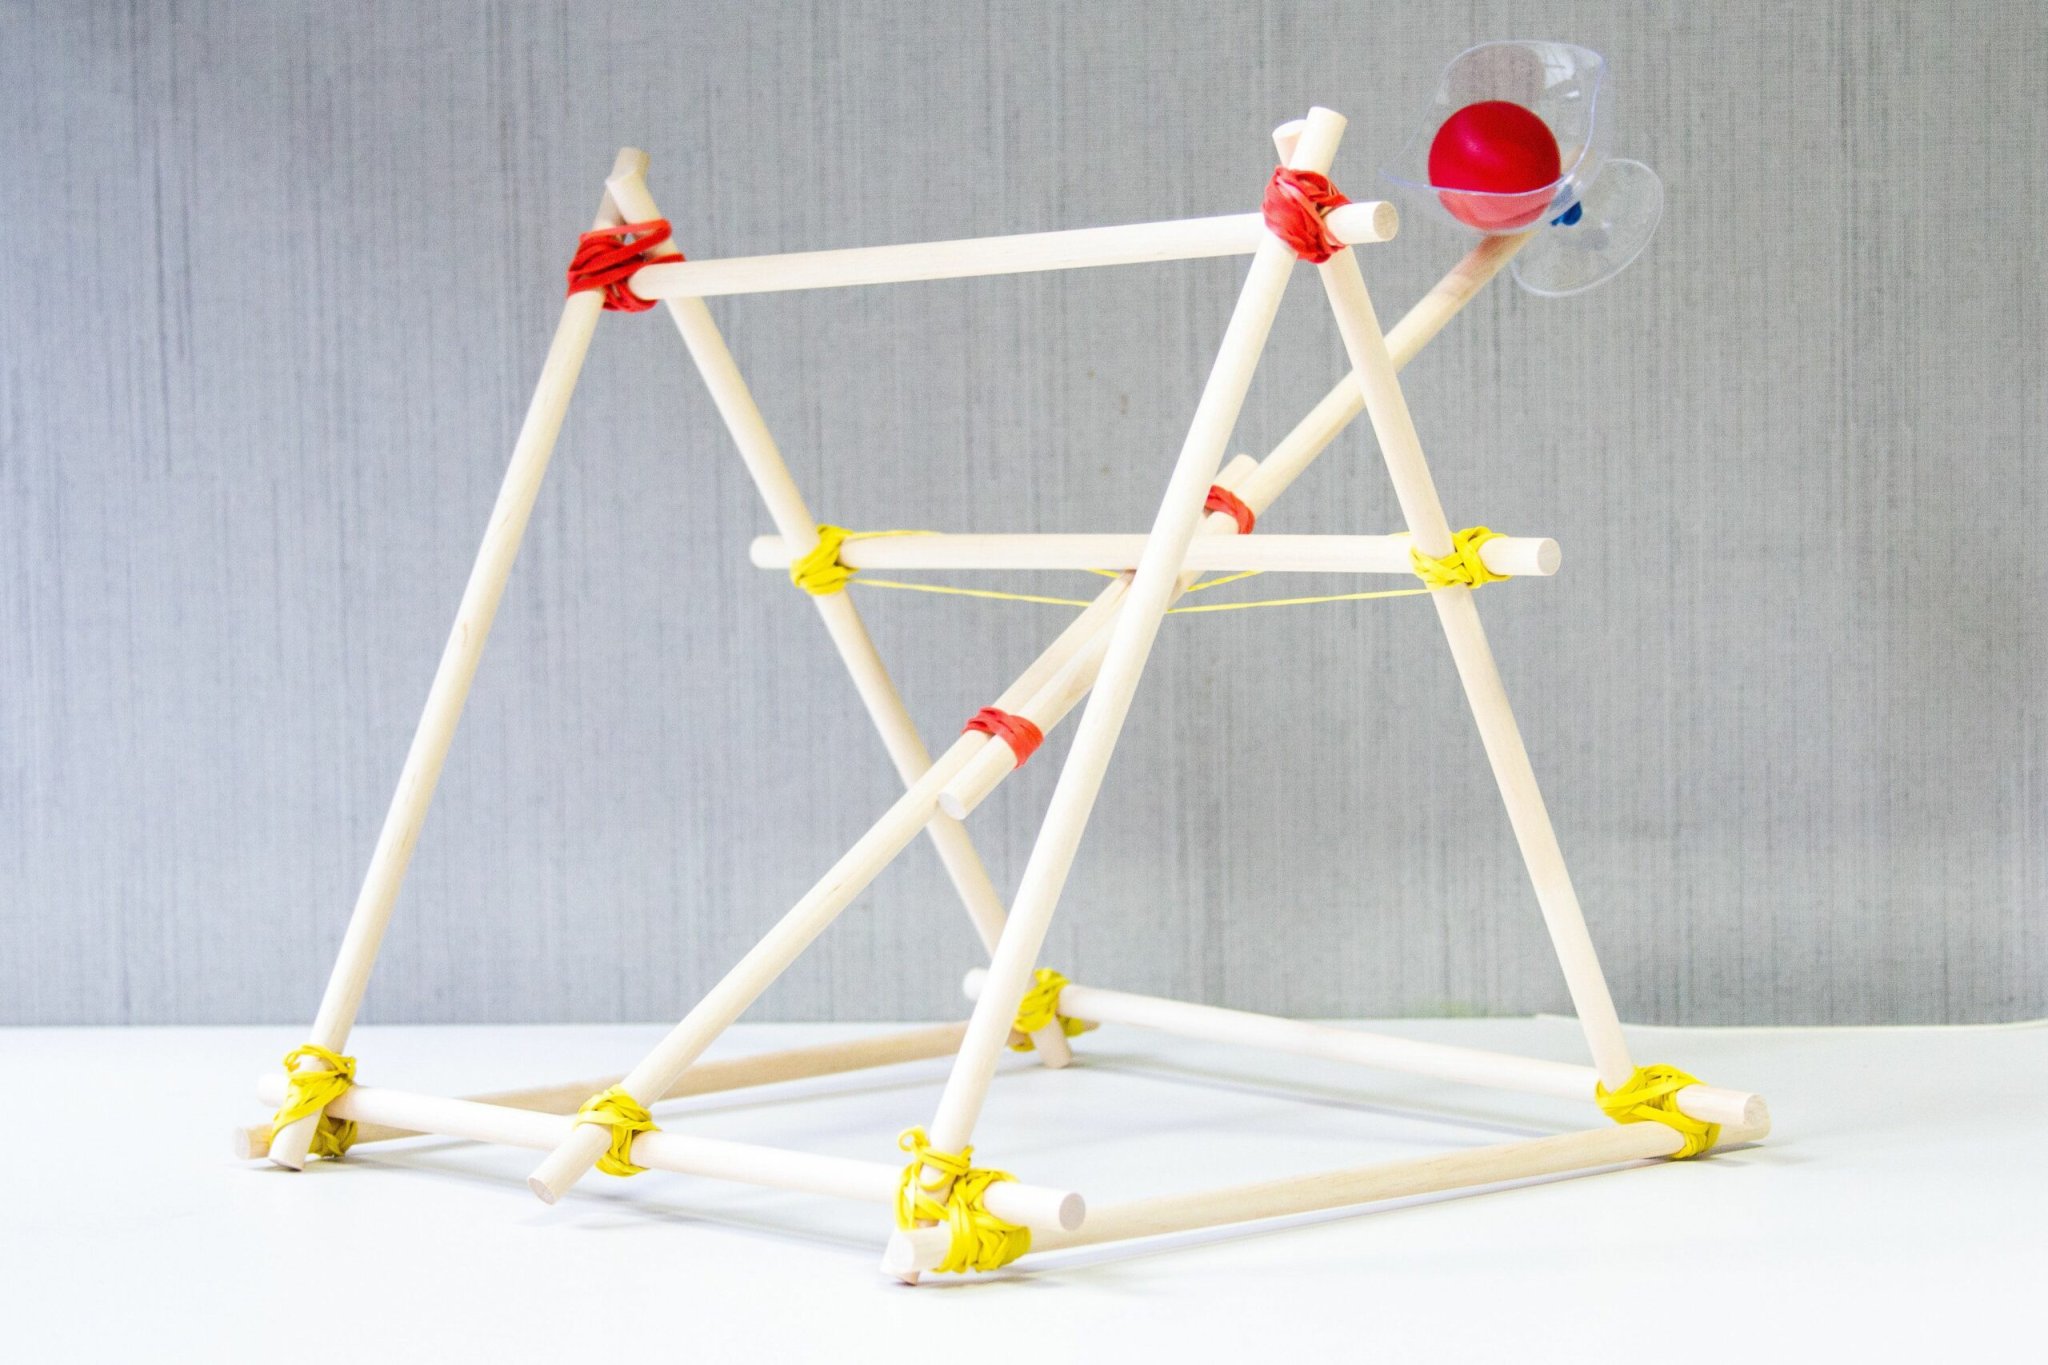
Now turn your attention to the throwing arm. Wrap rubber bands around it at two points and use them to affix a second dowel that extends several inches past the end of the first, stretching the arm’s length. Use another rubber band to tie a projectile holder (either a spoon or plastic cup) at the end.

Lift the arm until it touches the lower horizontal dowel from Step 4. Wrap one rubber band from one end of the horizontal dowel to the other so it holds the arm in place. This will produce the tension you need to propel your missiles.

When you’re ready to shoot, put a ping-pong ball in your projectile holder, brace the base, pull back the arm, and release to fire.

Of course, these guidelines are just a jumping-off point. If you find a way to make your ping-pong projectile fly higher, faster, and more accurately, then go ahead and modify our design. Try different projectile holders, adjust the location of the horizontal bar and the length of the throwing arm, test various spring strengths, and experiment with bracing different parts of the base.
