This story has been updated. It was first published in January 17, 2020.
Android phones come in a wide variety of shapes and sizes. But within, they all run the same basic operating system, that includes settings to let you tailor your smartphone to your needs. In this guide, we collected 24 lesser-known customizations for you to toy with.
Before we start, a quick caveat—although the same Android code runs all of these phones, manufacturers often modify the operating system by slapping a software skin on top. Our instructions specifically apply to Android 10 and Android 11, which you’ll find on Google’s latest Pixel phones.
[Related: 10 hidden tricks to try on your Android phone]
However if you own a phone that runs a different version of the operating system, you may still be able to apply these Android settings—you’ll just have to rummage around a little more to find them.
1. Increase font size
You don’t have to squint and strain your eyes when viewing Android screens. Open Settings and choose Display, Advanced, followed by Font size, to make adjustments. Drag the pointer along the slider to make changes, and check the preview window to see what the end result will look like. Once you set the Android font size, most apps will apply it.
2. Make sure you can find your phone
To maximize your chances of recovering a missing device, make sure to activate Android’s built-in tracking system. Open Settings, go to Security and tap Find My Device. After that, should you misplace your phone, head to this page in any browser and log in to your Google account. If you’re logged in to your account on Chrome, you can also type “Where’s my phone” on the search bar. You’ll be able to view your handset’s location on a the map, among other options, like making the device ring (even if it’s in Do Not Disturb mode), lock it, or erase it. For more details, check out our guide to finding a lost phone.
3. Tweak the Quick Settings panel
Drag two fingers down from the top of the screen, and you’ll open Android’s Quick Settings panel, which provides immediate access to Android settings such as Wi-Fi, Bluetooth, and flashlight mode. These shortcuts are useful, but you can make them even handier by customizing which ones show up and the order in which they appear. Open the panel, tap the pen icon on the lower left, and you’ll be able to add shortcuts and drag the icons into a new arrangement.
4. Reduce data usage
Android includes a built-in system to limit how much data background apps can gobble up (at least when you’re not connected to Wi-Fi). This mode will affect different apps in various ways—for example, in a browser, images might not show up unless you tap on them. To switch on this handy feature, open Settings and pick Network & internet, then turn on the toggle switch next to Data Saver.
5. Stop new apps from creating shortcuts
By default, when you install an app, it automatically appears as a shortcut on one of your phone’s home screens. This allows you to quickly launch a new app, but it can also clutter up your interface. To disable this default, perform a long press on any blank part of a home screen. When a menu pops up, choose Home Settings and turn off the Add icon to Home screen option. Note: This setting used to appear in the Play Store app, but starting in Android 8.0, you can now access it from any home screen.
6. Rotate the home screens
[Related: Android 11 is out now—here are some new features to try]
Within an app, you can turn your phone to switch the view from portrait to landscape or vice versa. But the home screen doesn’t come with the same default—you have to turn this option on. Return to the Home Settings screen discussed in the previous tip. Here, you can choose whether or not the home screens rotate with the phone by turning Allow Home screen rotation on or off. Note: You won’t be able to access this option (it will appear grayed out) if you’ve locked the orientation of your phone. To restore this ability, you must unlock your screen orientation—open Settings, go to Display, Advanced, and change the Auto-rotate screen option.
7. Project your phone on a bigger screen
Android now comes with built-in casting, so you can mirror the screen on any monitor or television equipped with a Chromecast device. Although many apps have their own Chromecast buttons, you can also project any screen or app from the Settings. Just go to Connected devices and select Cast. If you do this often, Android 11 also allows you to create a shortcut in the Quick Setting menu. Go to tip number 3 and drag the icon for Screen Cast to the top.
8. Change app permissions
You can see exactly how much access and permissions an app has by going to Settings, tapping Apps & notifications, and picking an app (or hitting See all apps to view the full list). Then, to view and edit that app’s access, tap Permissions. For example, you might allow an app to access your contact list but not your location.
9. Control battery use
Android now optimizes apps so they won’t drain the battery as much. For example, your email app can still run in the background, checking for updates, but it does so less frequently. However, you can exempt certain apps if you want them to always run at full throttle. Open Settings and tap Battery, then the menu button (three dots on the top right), then Battery Usage. Here, you’ll be able to see which apps drain your battery according to how much you use them. Tap on any of them and then on Battery Optimization. Next, hit the Not optimized link, then All apps. Finally, select an app and pick the Don’t optimize option.
10. Wake your phone with your voice
You don’t have to touch your phone to gain access to Google Assistant. You just need to adjust your Android settings. Open the Google app, tap the menu button (three horizontal lines on the bottom right), and then hit Settings followed by Voice. On a Pixel phone, tap the Google logo on the left of the search bar of your home screen. Tap on the Assistant Settings icon on the left (the box with three lines coming out of it) and then your avatar picture or initial in the top right corner of the screen. Choose Voice Match, and toggle the switch next to Hey Google. Then the phrase “Hey Google” will work at any time, even when your device is locked. In fact, you can use voice recognition to unlock your phone this way.
11. Free up more memory

If you’re running Android 7.0 Nougat or later, you can take advantage of Smart Storage. If your device is struggling for free space, this feature will automatically delete local copies of photos and videos that have safely been transferred to Google Photos. To enable it, open Settings, tap Storage, and turn on the Smart Storage toggle switch.
12. Adjust lock screen timing
Why should you reduce the time your phone takes to automatically lock the screen? Less down time makes it less likely someone will swipe your handset before it locks itself. This will also reduce battery drain, because the screen will stay lit for a shorter period. From Settings, head to Display, tap Advanced, and choose Screen Timeout. Then you can pick a time-out period that works for you.
13. Customize notifications from specific contacts
To help you instantly identify who’s calling—and to decide whether or not to pick up—you can assign certain contacts unique ringtones. Your default ringtone will remain the same—change it in Settings, under Sound & Vibration, and choosing Phone ringtone. To change notification settings for individuals, launch the Contacts app, tap the Contacts tab and then a contact name. Open the menu (three dots on the top right), and choose Set ringtone. Then you can select a specific sound from a list.
14. Change volume levels separately
You might not want to play your podcasts at the same volume as your ringtone. To adjust those separately, launch Settings and open the Sound & Vibration menu. Here, you’ll find volume sliders for media, call, alarms, and ringtones. You can also access individual volume settings by pressing the physical volume button, which will make one slider appear on screen, and then tapping the slider option on the bottom. This will open a menu where you can see all three volume sliders.
15. Unlock your phone in your car
Once you’re securely seated in your car, you might want your phone to unlock itself. This would let you open a map without entering a code, and would allow any passengers to put on your favorite tunes. Android can do this by recognizing your car stereo as a “trusted” Bluetooth device, one that proves you’re in possession of your phone. From Settings, head to Security, then Smart Lock, then Trusted devices. Finally, work through the simple setup process, and then your phone will unlock when it’s in the presence of your car stereo.
[Related: Android security settings you should check right now]
16. Turn on Wi-Fi automatically
Keeping your Wi-Fi off while you’re out and about increases your phone’s security and preserves its battery. But in the presence of a strong, trusted Wi-Fi network, one that you’ve used in the past, Android 10.0 and 11.0 can automatically turn your phone’s Wi-Fi back on. From Settings, tap Network & Internet, then Wi-Fi, then Wi-Fi preferences. Finally, turn on the Turn on Wi-Fi automatically toggle switch.
17. Change notification priorities
The latest versions of Android also let you prioritize different types of notifications from a given app. In Gmail, for example, you might choose to receive a noisy alert for important emails and a less obtrusive one for regular updates. Open Settings, tap Apps & notifications, and pick a specific app or tap See all to view a full list. Different apps will offer different categories of alerts, so choose Notifications to view them and configure different sounds for each.
18. Quickly switch between apps
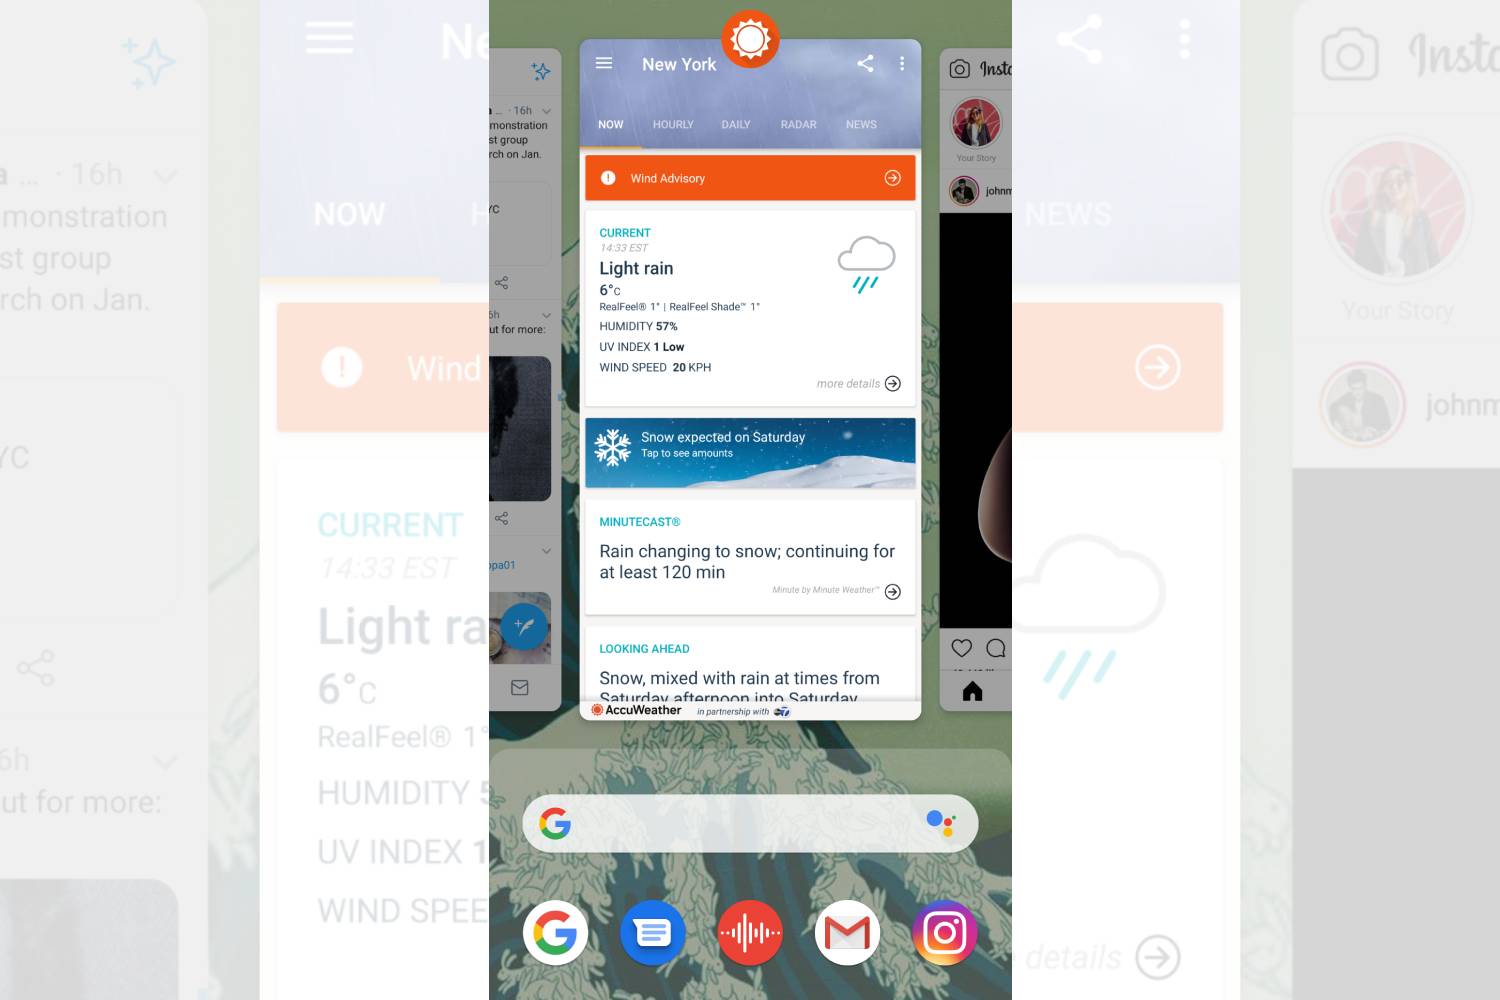
Jumping immediately from app to app is not, strictly speaking, an Android setting—but it still makes a very useful shortcut. On Android 8.0 a single tap on the Overview button—the square icon in the navigation bar—brings up a view of all your open apps as tabs. However, if you double-tap on the button, you’ll immediately jump from your current app to the one you were previously using. On Android 11, however, you have no buttons but you can still jump seamlessly between apps. While on an app, make a short swipe up from the bottom of the screen and then to the right to jump directly to the next opened app.
19. Change emoji mode
You can view emojis on the default Google keyboard for Android by tapping on the emoji button to the left of the space bar. But did you know you can pull up emojis with different skin colors or genders by pressing and holding on an individual icon? This works on most emojis depicting people or body parts, such as a thumbs up.
20. Show emergency information
If someone should discover your phone after you’ve been in an accident, having your key medical information show up on the lock screen could save your life. To do this, open Settings, choose About phone, then tap Emergency information. You can provide details like allergies and organ donor status, as well as emergency contacts.
[Related: Twenty features you didn’t know Android and iOS stole from each other]
21. Move the cursor more delicately
Using only your clumsy fingers, you probably have a hard time highlighting specific sections of text. If you’re using the default Google keyboard, then this neat trick will make it easier to move the text cursor just one or two characters at a time. Launch any app where you can write and edit text, and tap in a text box to pull up the keyboard on screen. Then, instead of moving the cursor within the text box itself, place your finger on the space bar. Tap and drag left or right on the spacebar to move the text-editing cursor in the same direction.
22. Tweak the color range
A phone’s “color gamut” controls the range of colors that you see on screen—a wider gamut means colors will appear more vibrant, but also less natural. You can adjust the gamut in Settings by going to Display, Advanced choosing Colors, and choosing Natural, Boosted, or Adaptive. Depending on the make and model of your phone, you may see different options listed here. Play around with them to find the color scheme that works best for you.
23. Snooze notifications
To clear a cluttered notification menu, you can drag individual alerts to the left, and they’ll disappear. But what if you want to clear those distractions now, but revisit them later, when you have time to deal with them properly? Snoozing notifications is a fantastically useful feature only available on phones that run Android 8.0 Oreo and up. To enable this feature, go to Settings, Apps & notifications, and then Notifications. Scroll down, tap on Advanced and turn on the toggle switch next to Allow notification snoozing. Once activated, the feature will let you drag any notification to the right, and a clock icon will appear. Tap the clock, and you can choose to snooze the alert for 15 minutes, 30 minutes, 1 hour, or 2 hours. Once the time has expired, the notification reappears as if it’s come through for the first time.
24. Get help from Cortana
When it comes to various AI assistants, everyone has a favorite. If you prefer Microsoft’s digital helper to Google Assistant or Samsung’s Bixby, you can install Cortana for Android. You can even make it the default app that appears when you hold down the Home button on Android 8.0 Oreo and up. Open Settings, go to Apps & notifications, and then tap Advanced, Default apps, and Digital assistant app.
