About four years ago, my father returned home from a business trip and showed me a picture he took of a person attached to some sort of futuristic jet pack. I’m pretty aware of new gadgets thanks to social media and websites like Popular Science, but I hadn’t seen or heard about anything like this before—I didn’t even know how to Google it! After several days, I gave up on my search.
Then, a year later, I stumbled upon a video and learned that these jet packs are actually called Flyboards, and they’re more like snowboards with pressurized streams of water that propel them into the air. The video made Flyboarding look not only fun, but beautiful! Multiple people were Flyboarding at the same time and doing coordinated tricks. I knew I had to try it for myself.

FLYBOARD® FAMILY 2 OFFICIAL
Unfortunately, I couldn’t find a local company that offered Flyboarding. Since then though, it’s started to gain popularity. I even found a company that offered to let customers Flyboard near my parents’ home on Long Island. However, $200 for a half hour of Flyboarding was not in my budget, so I put the dream of Flyboarding on hold.
Earlier this month, April 2016, my boyfriend and I went on a vacation to Costa Rica. While I was researching companies that offer zip-lining (which I was told is a must in Costa Rica), I found one called Sky Adventures that also offers Flyboarding for less than half the price of the Long Island company. (Spoiler alert: While a half hour doesn’t seem like a lot of time, it is plenty.) Without hesitating, I booked it!
The Experience
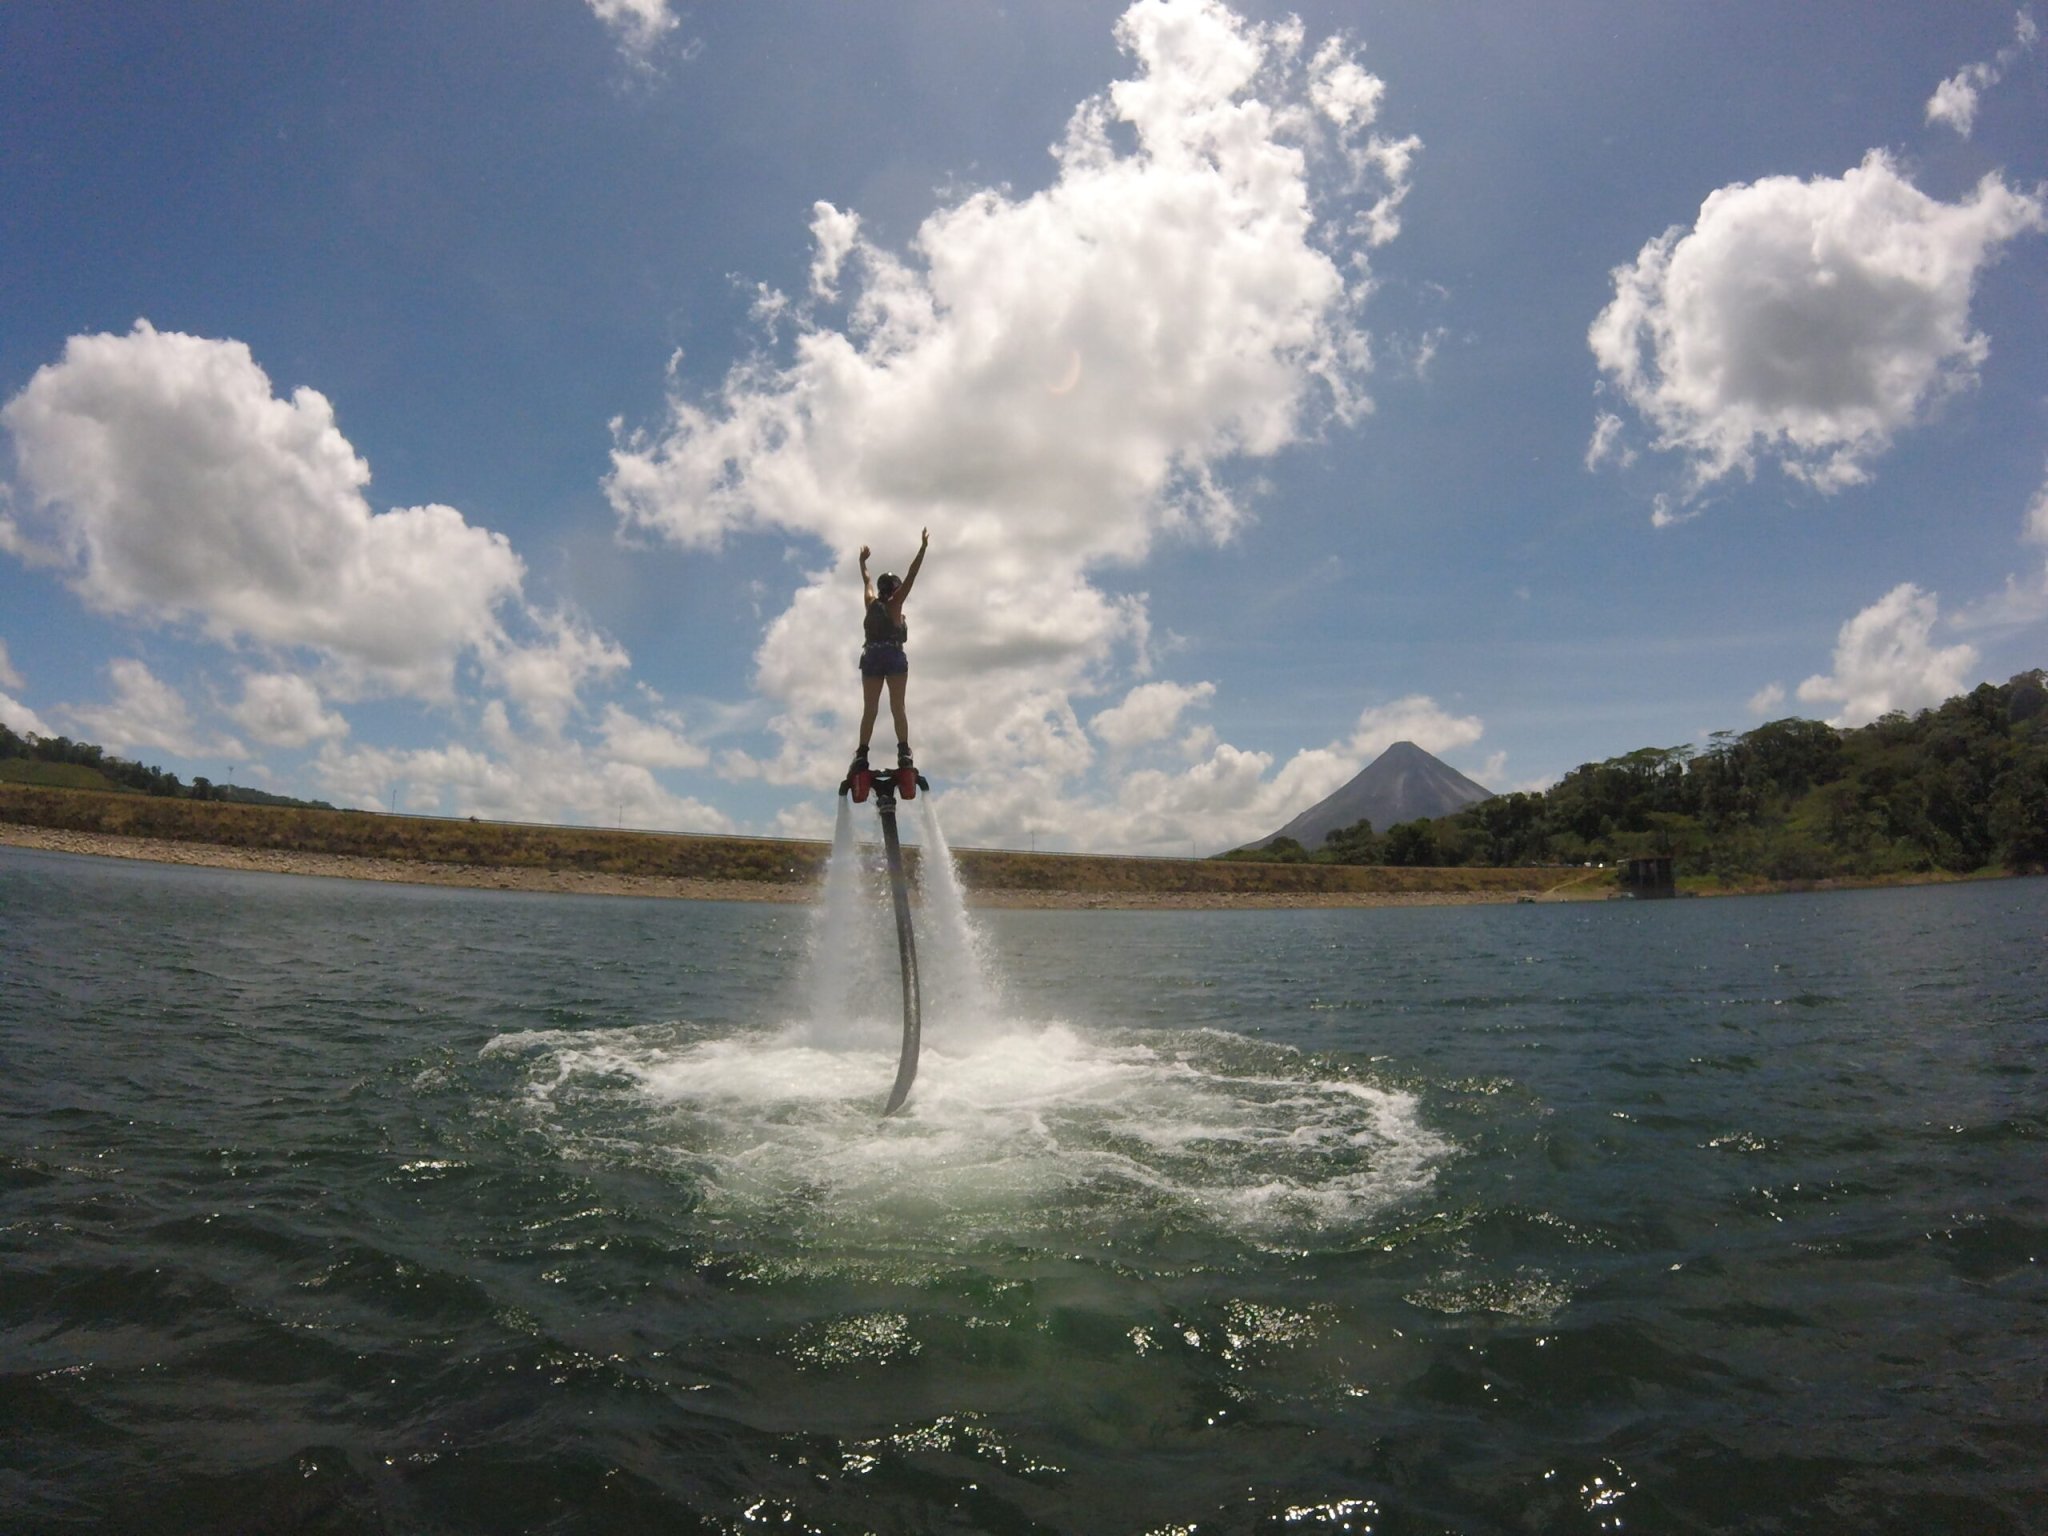
We met our instructor at the lake, where he was waiting for us with a jet ski and Flyboard. The Flyboard itself is roughly the size of a skateboard with two boot attachments for your feet, similar to a snowboard. The critical component of the Flyboard, though, is the hose that connects it to the jet exit of the jet ski. The water it pumps out is what provides the thrust to get the user out of the water and keep them up in the air.
(Author’s note: I admit I watched some “How-to” videos on YouTube to prepare myself, and it was a good thing I did. I felt much more comfortable with the board and already had a basic understanding of what the instructor went over with us.)

The instructions seemed simple enough. Swim far away from the jet ski, stand up while in the water with the Flyboard directly under you, keep your feet level with each other and your legs locked, and let the water pressure push you up. Once you’re in the air, pointing your toes down will move you forward, pointing toes up will move you backward, lifting your left knee up will move you right, and lifting your right knee up will, you guessed it, move you left. How high you go though is controlled by the water pressure from the jet ski, so it can only be adjusted by the instructor (or whomever is driving the jet ski).
I was ready as I could be. I got into a standing position and gave the okay. Turns out, Flyboarding is a lot harder than it looks.

Once more than half of my body was out of the water, I lost my balance and immediately fell over. It took me at least two more tries before I was able to emerge completely from the water, and hover one foot above the surface. Once I was comfortable at that height, the instructor turned up the throttle…which resulted in multiple crashes with the water.
I picked up a few tips to share with you to reduce the number of crashes you have, and make the ones you do have less painful:
As you’re flying, focus on a single point. The lake I was on was near the Arenal Volcano. In addition to the great view, the volcano gave me something to concentrate on, instead of perpetually thinking “Don’t fall! Don’t fall! Don’t fall!”
When you do crash, try your best to dive into the water. Put your arms above your head, one hand on top of the other, forming a point. This breaks the surface of the water and reduces the impact of the crash on your head. Even though you’ll be wearing a helmet, a head-first crash will still hurt.
Several launches later, I had finally gotten the hang of Flyboarding. I even managed to get six feet above the water, though it felt like I was twice as high as that. It was both scary and thrilling to feel like I was flying. I even attempted to control my directions on the Flyboard and spin around, like I’d seen in many YouTube videos, though I ended up in the water immediately.

Final Thoughts
Flyboarding is definitely worth trying if it’s in your budget. The price and length of your session will vary by location, but thirty minutes seemed to be the perfect amount of time for a beginner; it was enough time to get comfortable with the board, but I was finished before I was too sore. If you are more coordinated than I am, you might consider a 45-minute or an hour-long session. When my time was up, I was pretty sore and tired of getting water up my nose, but glad for the experience.
