The best way to freeze fresh meat
Avoid freezer burn with this food scientist’s tips.
This story originally featured on Outdoor Life.
It’s meat season. Knives are sharp, grinders are churning, and vacuum sealers are running hot. Most of us have our own traditions of how we wrap or vacuum seal game before freezing it. We do it the same way every year because … it worked last year. Why change it?
Well, at the start of this season, I got curious. What actually is freezer burn? And is there a specific way of processing wild game or otherwise fresh meat that will prevent it from occurring for a longer period of time?
So I hit up Kenji López-Alt, the mastermind behind Food Lab, which is all about using science to unravel the mysteries of home cooking.
Here’s what he said:
“Freezer burn is caused by the sublimation of frozen water (ice) into water vapor. Normally, when ice turns to steam, it melts into water first. Sublimation is when ice turns directly into water vapor, skipping the water phase. In a controlled environment, such as with freeze-drying, this process can preserve the shape and color of foods while removing its water content. But when it happens to meat in your freezer, the result is freezer burn—inedible dry swaths of meat that need to be trimmed before cooking.
This happens because the circulating air of the freezer produces a very dry, cold environment.
Wrapping meat in plastic can help prevent this by trapping the meat’s moisture in. But here’s the thing: Most household plastic wraps are actually permeable to air and water vapor, it traverses the plastic very slowly. Even with multiple layers of plastic wrap, you can get freezer burn.
Wild game meat, with its lean meat typically devoid of much intramuscular fat, is especially prone to this problem, as there is simply much more meat exposed on the surface for a given cut.
There are a few solutions. Vacuum-sealing bags specifically designed with thicker, impermeable plastic for long-term freezing will work better than standard plastic wrap, as will zipper-lock bags designed for freezer use.
If you don’t have a vacuum sealer, wrapping tightly in foil followed by plastic wrap works. The foil does the brunt of the work as far as a moisture barrier. The plastic is mainly there to prevent drips during freezing and defrosting and to ensure the foil stays tight.”
Two key takeaways here:
- Whether you wrap your meat or vacuum seal it, don’t skimp on the quality of the plastic. For wrapping, you want freezer-specific plastic like Glad FreezerWrap. For vacuum sealing, go with the heavy-duty freezer bags.
- Consider wrapping your meat in foil and then plastic wrap. I’ve never heard of this before, so I did a little web searching and sure enough found this entry on the National Center for Home Food Preservation (who even knew this was a thing?) website: “Heavy-duty aluminum foil can be used as a freezer wrap. Because it can be torn or punctured easily, it is wise to use an overwrap. Lightweight (household) aluminum foil is not satisfactory for home freezing.” I’m still a little skeptical about this method, but I’ll definitely try it with a few venison steaks this year.
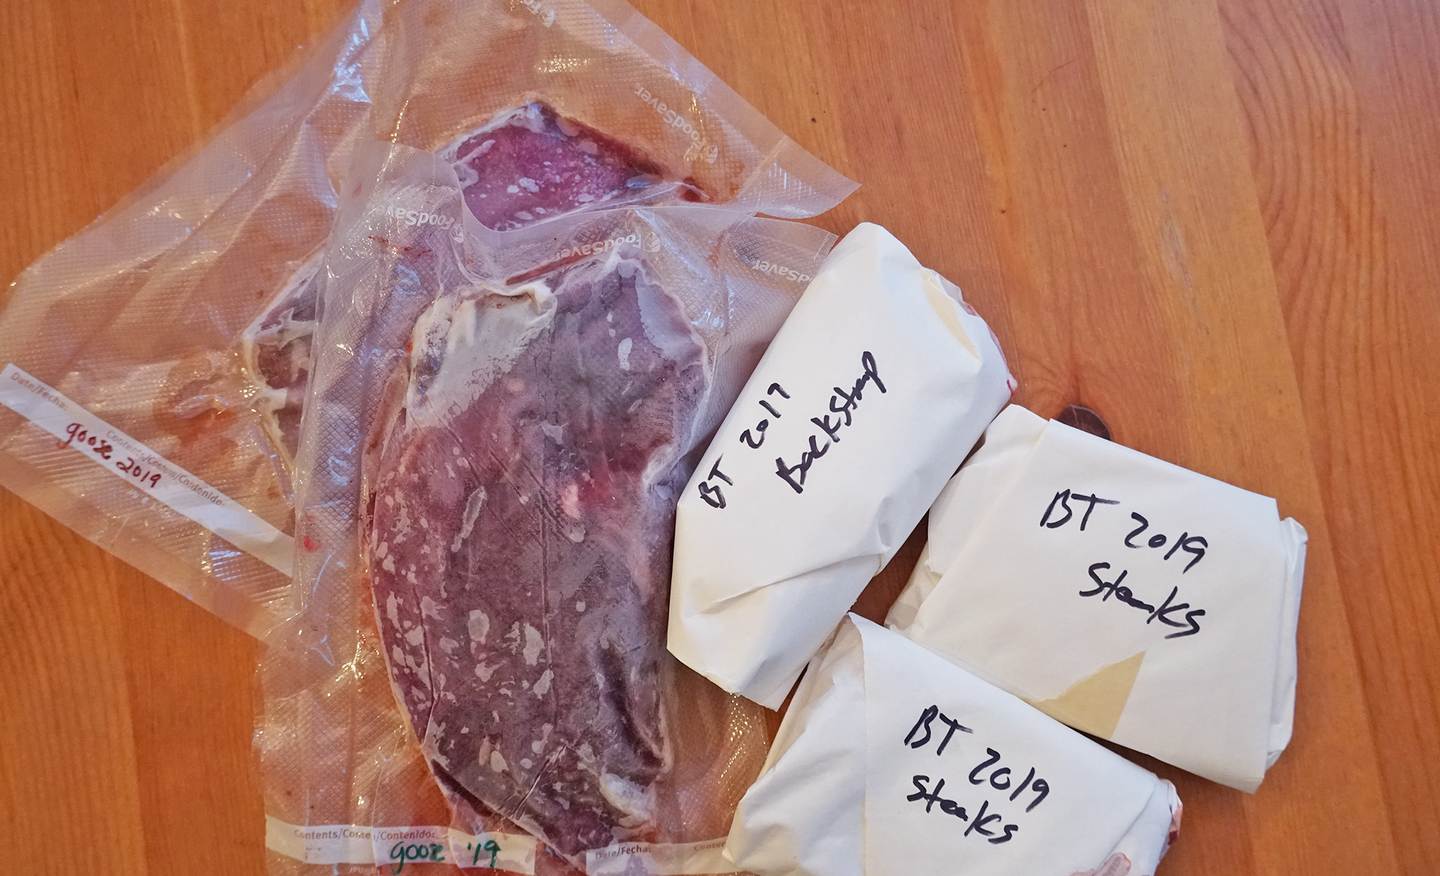
I’ve always had good success wrapping meat tightly in quality freezer wrap and then wrapping again with butcher paper. I like to vacuum seal my ground meat because those burger freezer bags always seem to get holes punched in them. Vacuum sealing steaks or bird breasts is fine too, but as you can see in the picture above, small air pockets definitely creep in, and you have to be sure to make sure the meat is carefully dried.
With the wrapping method, I have no problem keeping game meat freezer-burn free for about two years. But realistically, I make it a goal to have an almost-empty-freezer at the start of each fall. I have plenty of folks who are happy to be gifted wild game, and I like that little bit of pressure to fill the freezer back up during meat season.