DIY: How To Light Up Your Bike Wheels [Video]
Crafty, safe fun
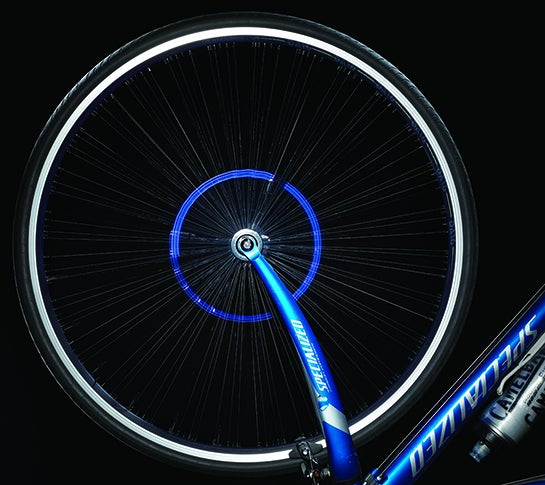
As the winter months approach, darkness is falling earlier and earlier. Do not bike gently into that good night! By spending a few hours tinkering with LEDs, you can outfit your dull wheels with hypnotically glowing rings.
Some kits on the market use customizable circuit boards to form animations as the wheel spins. Wiring your wheel to display a lighted circle is easier and cheaper, making it an ideal first foray into DIY electronics. Try varying the color, number, and placement of the LEDs to create intricate patterns. Or swap individual lights for a color-changing LED strip and an Arduino.
Even if you choose the simplest version of the project, it will still be visible in nighttime traffic. The video above shows a test-drive of this illuminated wheel—which bike-commuting Popular Science editors built in a candy-fueled electronics session.

You can choose how many LEDs your wheels need. The number should be six or less, and ideally a factor of the number of spokes on your wheel.
Materials
- 3 to 6 LEDs
- 3 to 6 resistors
- Insulated wire
- Heat-shrink tubing
- Electrical tape
- 9-volt battery
- 9-volt battery connector
- Zip ties
- Black duct tape
Tools
WARNING: When working with electronics, take care not to burn or electrocute yourself. When biking with electronics, follow the road rules and wear a helmet!
Instructions
Before selecting your resistors, check the LED packaging for its forward voltage and current. Subtract the voltage from nine, and then divide this number by the current in amps. For example, the pictured LEDs have a forward voltage of 3.1 volts and a current of 20 milliamps, or 0.02 amps, so this is the equation: (9 – 3.1)/0.02 = 295. Choose the nearest standard resistor value larger than this number—in this case, 330 ohms. You will need one resistor per LED, unless you choose to connect the LEDs in series.
If you have an even number of LEDs, and their forward voltage is three or less, you can use two lights per resistor—just wire two LEDs in series. (With a forward voltage of two or less, you can wire three lights in series.) In this case, adjust your resistor calculation: Instead of subtracting one light’s voltage from nine, subtract the voltages of both (or all three) before dividing by the current. With two LEDs in series, the prior example becomes (9 – 3.1 – 3.1)/0.02 = 140, so you could use one 150-ohm resistor for every two LEDs.
Mark evenly spaced spokes a few inches from the rim of the wheel. Placing the LEDs the same distance from the rim will create a glowing circle when the wheel spins.
Measure the distance between an LED’s position and the hub of the wheel. Cut two wires per LED to this length and strip both ends.
Twist one end of a wire around each LED’s longer leg (positive end) and twist one end of a resistor around its shorter leg (negative end). Connect the loose end of the resistor to a second piece of wire.
If you are wiring two LEDs in series, attach the negative leg of the first LED to the positive leg of the second with a length of wire, which must be long enough to stretch down to the hub of the wheel and then back up to the second LED. As before, attach the appropriate resistor and length of wire to the negative end of the second LED.
Solder the assembly together, mark its positive end, and cover the exposed joints with electrical tape and/or heat-shrink tubing. You can use the lighter to tighten the tubing—just make sure not to burn the components underneath.
Twist the positive ends of each LED assembly together and solder them to the positive wire of the 9-volt battery connector. Do the same for the negative ends and the negative wire. Cover the exposed wires with tubing and/or tape.
Firmly attach the 9-volt battery to the hub with duct tape and a zip tie. Leave room for the 9-volt battery connector to snap on.
Use duct tape and zip ties to securely attach LEDs and wires to the spokes. Snap the battery connector to the battery and give your wheel a spin!
This article originally appeared in the November 2014 issue of Popular Science, under the title “Light Up Your Bike”.