How to Build a Sweet-Sounding Tube-Amp iPod Dock
Half a century ago, vacuum tubes were very common in audio amplifiers. A small voltage applied to the grid of...
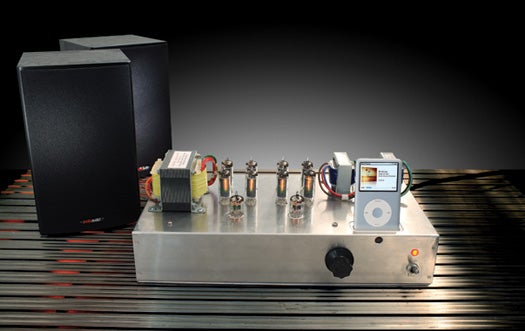
Half a century ago, vacuum tubes were very common in audio amplifiers. A small voltage applied to the grid of a vacuum tube controls a relatively large current that drives the electromagnet in a speaker, creating movement and thereby sound. Modern solid-state amps are superior in cost, size and reliability, but many people still prefer the warm sound and mesmerizing orange-yellow glow of a tube amp.
Fortunately, there’s a way to combine the distinct sound and look of tubes with the utility of an iPod dock. I’ve seen a few commercial and DIY tube-amp docks, but they’re expensive, uninspired or both. So I’ve come up with a version that anyone can build for about $400.
It uses a number of off-the-shelf components, including the dock itself and an easy-to-assemble tube-amp kit for the heart of the system. I used the 16LS kit from s5electronics.com, but there are many options depending on how much money you want to spend and how loud you want the amp to be. I built my dock into an aluminum enclosure from Hammond Manufacturing. You can replicate mine or design your own.
Once you’ve made those choices, the most time-consuming part of the project is putting holes in the enclosure and mounting the components. Add a set of speakers, and you’ll have a functional and cool-looking amp you can control with a remote. It isn’t outrageously loud, but it will easily fill a living room with fantastic sound.
_
Here’s how to build your own tube amp._ Complete build instructions and diagrams are available here.

Audio Cable
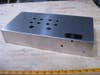
Enclosure
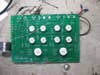
Top of Side Board
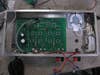
Mounting Components