Vise Cakes: Making a Grain Puffer on the Cheap
The hosts of Food Jammers show how to make a version of a multimillion-dollar commercial grain puffer for about 50 bucks. See the video inside
The machinery that snack and cereal companies use to transform rice and other foods into puffed snacks is expensive and operates at extreme pressures and temperatures. Since you can buy the resulting cheese puffs, rice cakes and toasty oat cereals anywhere, why try to make them ourselves? Because we were curious whether we could figure out a cheap way to crack the code of puffing technology. Plus, we like to build elaborate machines and to blow things up, even if it’s only spelt grains and millet cakes.
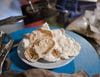
The science behind puffing is simple. Heating the moisture inside of a grain creates pressure and builds up steam, which is trapped by the grain’s hull or shell. When that hull suddenly fails, everything inside it expands in a blast, transforming the grains into a crispy, porous mass; the best example of this is popcorn. Some grains can fuse together, making a cake.
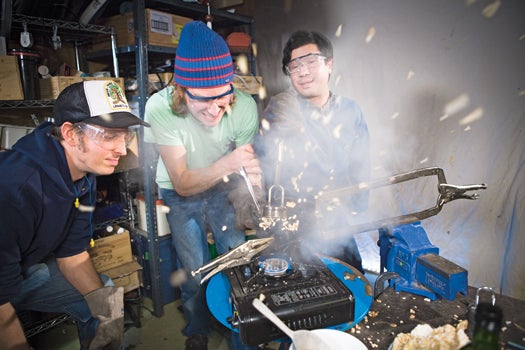
Not all grains are easily puffed, though. Try to puff rice or wheat berries in this way, for example, and they just burn. Two things are required to get almost any grain to puff. You need an optimal amount of moisture inside the grain, and you must artificially make a popcorn-like shell that can temporarily hold steam under pressure and release it suddenly. We built a metal shell using a pipe, a rod and a plate to mount the pipe on, forming a bottom to clamp against, like a piston in a cylinder. Using vise grips, we put the shell over a butane burner, clamped it tightly, and then unclamped it to make it puff. At high temperatures, you have 10 to 20 seconds when the grains puff before they start to burn. We puffed millet, wild rice, sorghum, barley, and white and brown rice. We called the results “vise cakes.”
Our equation for the process looks roughly like this: 150 psi (pressure) and 480ºF (heat) x 12 seconds (time) + sudden release back to atmosphere = 1 vise cake.
Last year we built a rig to make mini vise cakes, which worked well, but it took a long time to produce a large quantity. So this time we increased the scale, creating a design that could make the cakes with a 2.5-inch diameter. All told, it cost us only $57. Our design requires at least four hands to operate, though why puff solo when you can puff in a group? Besides, you’re saving a good million bucks or so off the price of a commercial machine.
Click to launch a step-by-step gallery showing how to construct and use a grain puffer.
WARNING: Using tools at high pressures with flames can be dangerous. The puffing action and release of locking pliers can move hot parts quickly. Play it safe, wear proper protection, and secure loose articles and moving parts. Keep fire extinguishers handy.
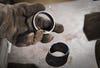
Step 1

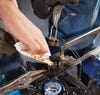
Step 2
Step 3
Step 4