How To Make Your Own Grow Lights
Create a light system to keep houseplants thriving during winter's short days.
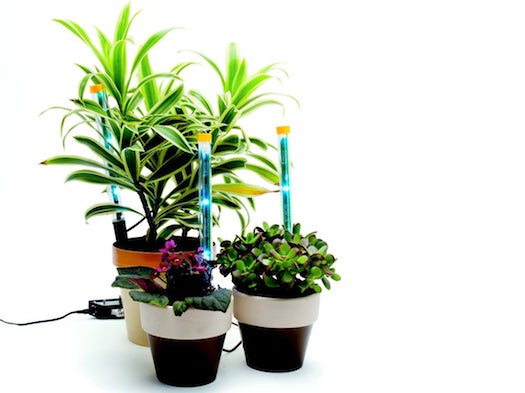
Setting up specialized grow lights that mimic the sun’s rays is a good solution, but you can get similar results with LEDs. We connected three inside a clear plastic tube to make a “light spike” that you can stick into a pot for direct exposure, and added a controller that adjusts the brightness.
MATERIALS
Project box
Drill
2.1-mm power-connector jack
10-position header
100k-ohm slide potentiometer
Soldering iron and solder
Electrical wire
10k-ohm resistor
Wire strippers
White LED design kit
Five clear plastic tubes with endcaps
Five two-position connectors
15-volt 1A wall-mount power supply
STEP 1
Drill six holes in your project box to accommodate the various components, then assemble the controller by mounting the power-connector jack inside the box and the 10-position header and the 100k-ohm slide potentiometer on the box’s sides.
STEP 2
Wire the box according to the circuitry diagram.
STEP 3
Cut the wire inside the LED design kit into five equal lengths. Attach the red wire to the red connector, and the black wire to the black connector, on each LED strip. Slip each strip inside a clear tube, and seal it with the endcaps so that it’s watertight.
STEP 4
Add the two-position connectors that will hook up the tubes and the box. Attach each one to the red and black wires from each LED strip.
STEP 5
Press a spike into your plant container. Keep all wiring, electrical connections, and the LED strips away from soil and moisture.
STEP 6
Plug the spikes’ two-position connectors into the control box’s 10-position header, and connect the power supply to turn the LEDs on.
STEP 7
Adjust the slide potentiometer to control the brightness of the spikes, and watch your garden grow.
This project was excerpted from The Big Book Of Hacks: 264 Amazing DIY Tech Projects, a compendium of ingenious and hilarious projects for aspiring makers. Buy it here. And for more amazing hacks, go here.