The Secret To Beautiful Steel is Found at the Bowling Alley?
The best way to finish your steel and a link to my chemist ancestors

Steel just as it comes from the steel yard looks undeniably cool. If you leave it that way though, you’ll be treated to a rusty piece of metal in short order, as the iron in the steel inevitably oxidizes from the moisture in the air. To keep it clean, you need some kind of coating that seals off the surface. You can paint it and you can coat it with a clear polyurethane, but my favorite finish is simple bowling alley wax.
Paint hides all of the personality of the steel’s mill finish and the details of the fabrication. Polyurethane adds a shiny layer that often doesn’t look quite right. Wax presents a beautiful dull finish that looks a part of the metal itself and keeps moisture out. Since the wax is only a coating and doesn’t actually bind with the steel, it must be periodically reapplied. But unless the piece is in a particularly brutal environment—like outside—the wax will typically last at least a few years.
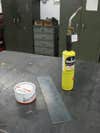
People use all sorts of different waxes and concoctions for finishing steel, but I prefer Butcher’s Wax for most of my projects. There are two versions, an amber wax and a clear “bowling alley wax.”
The first step in applying a wax finish is to clean and dry the steel. I typically use mineral spirits to cut any grease or oil on the piece. We don’t want to trap in any contaminants with the finish.
The Makings of a Butcher’s Wax Finish
Gasses can be dissolved in metals, and water vapor is no exception. Before applying the finish, that moisture must be driven out or rust will form underneath the wax. I use a Mapp gas torch for this. As you heat the metal, a haze will appear. This is the moisture coming to the surface. As it evaporates, the haze will clear up. Move over the entire surface of the steel ntil it goes through this cycle.
The Makings of a Butcher’s Wax Finish
It is best to apply the Butcher’s Wax while the steel is still warm, but not too hot. The ideal temperature will melt the wax quickly, but will not boil it. If the part to be finished is large, start while the steel is still on the hot side, so that it will still be warm enough to melt the wax by the time the entire part is waxed. I use either a rag or a cheap paintbrush to apply the wax. Work the wax over the entire part and make sure everything is covered, but don’t apply too thick of a layer. If you put down too much wax, you will pay for it in the next step.
The Makings of a Butcher’s Wax Finish
After the piece cools, the wax will appear dull, which means it’s time for buffing. Using a clean cloth, buff out all of this dull wax as if you were waxing a car. Thicker applications will take serious elbow grease while thin layers will buff out easily. When the wax has been sufficiently buffed, the dullness will be gone, replaced with a slight shine. The finished wax should feel smooth and slippery to the touch.
The Makings of a Butcher’s Wax Finish
With that application of wax and just a bit of work, you will have applied a finish unrivaled by polyurethane that brings out the warmth, color, and texture of your metal work. When the finish begins to look thin, or if any surface rust appears, just clean (and abrade if necessary) the surface and add a new layer of wax.
The wax finish only forms a surface layer that adheres to the metal. Interestingly, oils will actually soak into metal and gasses will dissolve into metals. Here, from the June 27, 1930 issue of Time magazine, is a description of my chemist great-grandfather’s research on the topic: