The essential apps for any iPhone
The basics that will change your life.
Apple’s iPhones come with a pile of functionality built right in, covering maps, email, the web, music, movies, and more. But if you stick to what comes with your iPhone, you’re really missing out.
Here we’ve pulled together our favorite third-party apps on iOS. No matter your interests, you should find something of value here.
(You may notice some crossover with our list of essential Android apps. Some apps are just that good.)
1. Overcast
When it comes to podcast players, few have the polish or range of features Overcast can offer—it certainly runs rings around Apple’s own podcast player. From the way it can boost and normalize dialog levels, to the automatic silence trimmer, it comes packed with a host of ways to improve your podcast listening experience.
Overcast also supports smart playlists, enabling you to queue up episodes based on the podcast name or whether it’s already been played. You even get a web interface you can use, with all your podcast episodes synced across devices. The app is exclusive to iOS, and free to use with a few ads (you can pay a subscription to remove them).
Overcast for iOS, free or $10 per year
2. Instagram

Instagram is a relatively obvious choice for a best iOS apps list, but we’re still going to include it just in case you’ve never tried it (or forgotten about it). The privacy issues surrounding parent company Facebook aside, Instagram really does excel at getting your mobile pictures looking their best (the app’s original mission). Plus it’s a cheerful and almost-social way to spend a few minutes of dead time.
In addition to its core functionality—photo filtering and editing—the app has evolved to include direct messaging, Snapchat-style Stories that disappear after 24 hours, and livestreaming. No matter what your attitude to phone photography, Instagram is worth getting installed on your iPhone.
Instagram for iOS, free
3. Instapaper

From one Insta app to another: Instapaper has all the features you need to take control of your read-it-later list (all those articles on the web you keep meaning to get around to browsing). You can save articles from your phone or desktop via a mobile extension, then catch up at your leisure in the Instapaper app.
Instapaper cuts out all the page adverts and other distractions to leave you with a clean and clear reading layout that you can customize in terms of fonts and colors. Sign up for a premium account ($3 per month) to get the option of having your saved articles read out to you, or to send articles to Kindle devices.
Instapaper for iOS, free or $3 per month
4. Afterlight

Plenty of apps will help you edit images on your iPhone, but Afterlight is easily one of the best, even if you do have to pay a few dollars for it. Just about anything you want to do with your pictures—from brightening dark shadows to dropping text stickers on top of your images—Afterlight can handle.
And despite the wealth of features, filters, and tools on offer, Afterlight never feels confusing or difficult to use. I particularly like the way Afterlight can drop Instagram-style filters on top of images, as well as create spectacular light effects or add grainy textures to really make your mobile pictures stand out.
Afterlight for iOS, $3
5. VLC Player

Apple’s own apps keep you pretty well covered when it comes to audio and video, but VLC Player is definitely worth installing. It’s stable and quick, and it can handle just about every file type there is. Plus it offers extra features you might find useful, like support for streaming media straight from the web.
The app also lets you sync files from a whole host of other services, including iTunes, Dropbox, and Google Drive, and the playback controls are intuitive and easy to get to grips with—whether you need to scrub through a music track or bring up subtitles on a video. Best of all, it’s open source, so it’s completely free to use.
VLC Player for iOS, free
6. Moleskine Timepage
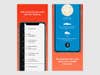
Add some useful extra smarts to your schedule with the help of Timepage from Moleskine. It takes the basics of your calendar and adds a pile of useful features on top, whether that’s inline weather forecast information, tight integration with Uber, or an intelligent daily view that makes your next 24 hours that much clearer.
You can get notifications when it’s time to leave for an appointment (as well as directions there), add your to-dos to the mix so you never forget an important job, see at a glance how busy your week or month is looking, and much more. The app requires a $2 per month subscription, but you can try it out for free before paying.
Moleskine Timepage for iOS, $2 per month
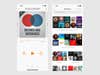
7. Gmail

We’d say all of the Google apps are worth installing on your iPhone, from Maps to Drive, but for now we’ll just highlight Gmail. The versatile email client brings Google’s superior searching, labeling, and filtering tools right to your iPhone, and lets you sync multiple email accounts (including iCloud ones) together in one place.
Google continues to add in useful features on a regular basis, including undo send (for when you have second thoughts about an email) and the ability to automatically sort emails by importance (based on Google’s trained algorithms). Oh, and the app looks rather nice on the screen too, which always helps.
Gmail for iOS, free
8. Bear

You might be perfectly happy with the Notes app that comes with iOS … but are you? Are you really? Bear provides a gorgeous note-taking interface and combines it with some super-smart to do list management features, so it’s essentially an all-in-one solution for starting on top of everything you need to do and think about.
As well as that eye-catching interface, Bear offers both automatic and manual tagging of your notes, a comprehensive search feature, and gesture support, so you’re never far away from what you need to find. A premium subscription ( $1.50 per month) adds more themes, more export options, and cross-device syncing.
Bear for iOS, free or $1.50 per month
9. Shortcuts
Shortcuts can single-handedly supercharge your iPhone, letting you combine multiple actions into one group that’s launched with a button tap or Siri voice command. It’s actually developed by Apple (following its acquisition of Workflow), but as it requires an additional download we’re including it in our list here.
You can, for example, text a loved one, get directions home, and turn up the central heating as soon as you walk out of the office; or dim the smart lights in your bedroom and put your phone in Do Not Disturb mode at the same time; and so on and so on. Anything you can do on your iPhone, you can combine with Shortcuts.
Shortcuts for iOS, free
10. Day One

You might not think you need a journaling app on your phone—but give Day One a try and there’s a good chance you’ll change your mind. It boasts (1) a beautiful user interface, (2) the ability to easily combine text, audio, photos and more, and (3) a host of useful touches (like location and activity tagging). All of these things make it a joy to use.
With tags, a powerful search system, and a choice of layouts, looking back on your precious memories is very straightforward. The app is free to start using, and if you decide to start a premium subscription ($25 per year), you can create an unlimited number of journals, get unlimited cloud storage, use a dark mode, and more.
Day One for iOS, free or $25 per year
11. Plex

We’re huge fans of Plex and the way it can stream your movies, music, and photos to any iOS device you like, anywhere in the world—if you pay the $5 per month subscription fee. Streaming content to computers around your home on a local network is completely free, so you can try it out to see if you like it first before paying.
Think of Plex as like your own personal Netflix or Spotify, giving you access to your digital stuff anytime, anywhere. A Plex server app sits on your Windows or macOS computer, beaming out files to whatever device wants them—the apps are very slick and stable, and come packed with useful features (such as support for subtitles).
Plex for iOS, free or $5 per month
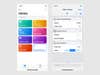
12. LastPass
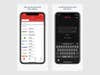
Trying to keep track of dozens of passwords and login details can be difficult, so let a password manager like LastPass take the strain. It’ll handle all your logins, secure notes, credit card codes and more, all protected by a single master password. It also works seamlessly with Touch ID, Face ID, and two-factor authentication.
Honestly, there’s not a huge amount to choose between the top password managers on the market, but they all offer free trials so you can see which one suits you best. We’re giving LastPass the nod here for its cross-platform syncing, its intuitive user interface, and the number of features it offers without a subscription.
LastPass for iOS, free or from $24 per year
