Polyphemus demonstration and evaluation kit
Build your own Arduino demo board.
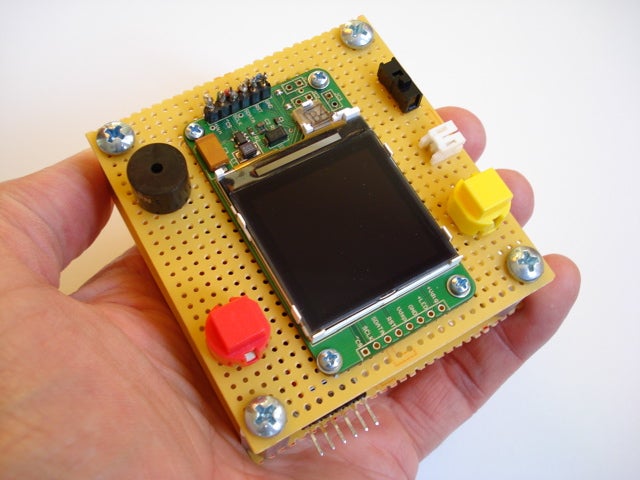
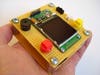
Every AVR programmer worth her weight in ATmegas knows about the AVR Butterfly—a ridiculously low cost ATmega169 demonstration and evaluation kit. Lamenting the lack of such a kit for the ATmega168 drove me to design my own demo/eval kit for the Arduino microcontroller family. This project became a compulsion that cost three complete redesigns, five destroyed ATmega168s, and hundreds of hours of point-to-point wiring. The result was Polyphemus—an ATmega168 demo kit that you can build from your own spare-parts box.
Named after the gorgeous giant silk moth with large, colorful “eyespots” on its hind wings (Antheraea polyphemus), as well as the gigantic Cyclops who tormented Odysseus, this Polyphemus sports several exciting features:
- ATmega 168 microcontroller (housed on a Freeduino board)
- Color Nokia 6100 LCD
- 2 multi-state pushbuttons
- White LED
- Phototransistor
- Piezoelectric buzzer
- 3.7-volt rechargeable lithium battery
- Analog input connector
- FTDI USB programming connector
- Compact 3-by-3-inch handheld form factor
By using a 3.7-volt battery to power Polyphemus, no additional power regulators are needed. Also, no DC-to-DC boost converter is needed for powering the Freeduino and white LED.
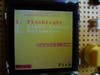
The user interface for Polyphemus is displayed on the color Nokia 6100 LCD. Using one pushbutton to move the menu and the other to “pick” a selection, you can choose from three built-in functions:
- Flashlight: turn the white LED on or off
- Light sensor: sample ambient light readings in milliamp units
- Voltmeter: test power connections (less than 5VDC)
Stats
- Time: 13 hours
- Cost: varies; all new parts: $78.60
- Difficulty: moderate
Parts
You can build this “kit” from off-the-shelf parts—no printed circuit boards are needed. Also, you can add, replace, or substitute your own parts for the parts recommended in Polyphemus (e.g., if you don’t have a white LED, try another color of LED).
- Carrier board (SparkFun Electronics #LCD-00600; $39.95)
- RBBB Freeduino Kit Plus (Wulfden at Hawk’s Mountain; $14)
- White LED 10,000 mcd, 3.3 volts (Mouser #859-LTW-2S3D7; $0.41)
- Ambient light sensor (Mouser #513-NJL#7502L; $0.36)
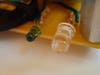
- 3-volt rechargeable battery (SparkFun Electronics #PRT-08818; $4.95)
- 24-millimeter coin cell holders (DigiKey #BH2430T-C-ND; $0.95)
- Yellow SPST switch (DigiKey #401-1984-ND; $0.99)
- Red SPST switch (DigiKey #401-1985-ND; $0.99)
- I used an obsolete DBX-01PN buzzer; try this buzzer instead: CEM-1201 1.5-volt buzzer (DigiKey #102-1152-ND; $0.63)
- 2 (10K) resistors (Mouser #660-CFP1-4CT52R103J; $0.10)
- 1K resistor (Mouser #660-CFS1-4C102J; $0.05)
- 22-ohm resistor (Mouser #660-CFS1-4CT52R22OJ; $0.05)
- SPDT switch (SparkFun Electronics #COM-00102; $1.50)
- JST right angle connector (SparkFun Electronics #PRT-08612; $0.95)
- 2-position JST plug housing and pins (DigiKey #455-1165-ND; $0.46)
- Mini hook test connector, red (DigiKey #461-1014-ND; $1.74)
- Mini hook test connector, black (DigiKey #461-1013-ND; $1.74)
- 2¾-by-6 1/16-inch perfboard (RadioShack #2761395; $2.79)
- Hookup wire (RadioShack #278-1224; $5.99)
Instructions
1. Download our Polyphemus project archive. Inside this ZIP file you will find source code, board layout information, datasheets, and image files.
2. Cut the perfboard into two pieces. One piece will hold the Freeduino, LED, battery holder, and phototransistor, while the second piece will support the Nokia color LCD, pushbuttons, buzzer, analog connector, and power on/off switch.
3. Mount the Freeduino and support components on the lower piece of perfboard.
4. Mount the Nokia LCD and support components on the upper piece of perfboard.
5. Use small lengths of wire to route connections between the Freeduino, the support components, and the Nokia LCD.
6. Connect the negative terminal of the battery holder to one terminal of the on-off power switch. Connect another length of wire from the switch to the Freeduino.
7. Use the free Arduino programming environment for loading the Polyphemus code on the Freeduino.
8. Insert the battery into the battery holder (watch the holder’s polarity!) and turn on the power switch. In a couple of seconds, the buzzer will beep twice and the main menu screen will be displayed. The complete sketch weighs in at slightly less than 6kb. Feel free to evaluate your own components on Polyphemus. Remember to avoid Port B when adding new components (it’s used for communicating with the LCD). Now don’t let some “geeks” poke your eye out.