Network your backyard
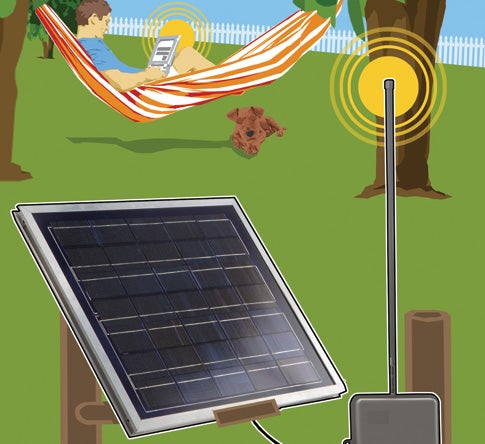
Surf the web from the hammock out back (or the park down the block) with this solar-powered WiFi extender.
This story has been updated. It was originally featured in the June 2006 issue of Popular Science magazine and involves outdated technologies and services. For current advice, read our regularly updated story about how to get WiFi to every part of your home, or check our product review team’s picks for the best WiFi extenders.
The promise of WiFi is freedom—the ability to bring your laptop or PDA away from the anchor that is your desk and into your life. With most wireless routers, however, your life had better stop at around 300 feet, and forget about heading outside. Between the noise generated by other local wireless devices and physical obstacles like furniture and walls, chances are your Wi—Fi signal is little more than a whisper by the time it hits your backyard. So I built a box that can pick up that signal and boost it another 200 to 300 feet. It uses a Linksys WiFi range expander ($100; linksys.com) modified with an omnidirectional 9dBi antenna ($58; pacwireless.com). To avoid unsightly extension cords in the flower bed, I added a lead-acid battery ($22; radioshack.com) and a 10-watt solar panel ($119; sundancesolar.com) to charge it.
My weatherproof box radiates the signal equally in all directions, but you could use a directional antenna instead to shoot your WiFi to a more specific area of your yard or neighborhood (try wlanparts.com for more antennas). See the basic steps below, followed by a detailed how-to, along with a parts list and more photos. Then brew some iced tea and start surfing outside.
- Project: build an outdoor WiFi box
- Time: 3 hours
- Cost: $375
- Difficulty: easy | | | | | hard (Editor’s note: 4/5)
Parts
- Linksys WRT54G Wireless Router ($70; various sources online)
- Linksys WRE54G Wireless Range Expander ($100; various sources online)
- RadioShack Universal low power DC power adapter (pn: 273-1811) with 3-volt selector ($23; radioshack.com)
- RadioShack 12 VDC Adapter Accessory Outlet (pn: 270-1527) ($7.49; radioshack.com)
- Solar panel, at least 10 watts and 14 volts ($119; sundancesolar.com)
- Water-resistant outdoor enclosure, 9 by 6.1 by 3.1 inches (pn: MC-ENC-196YG) ($12.91; defactowireless.com)
- Pacific Wireless 9 dBi 2.4 GHz vertically polarized omni-directional antenna with N-female connector (pn: OD24-9) ($57.95; wlanparts.com)
The following parts are available at any electronics or hardware store:
- 12-volt sealed lead-acid battery with spade terminals (7 amp-hour) ($21.99)
- 24-inch pigtail cable with N-Male connector ($14.95)
- 18-gauge wire, black and red ($5)
- Female insulated quick-disconnect connectors, crimp-type, sized for battery spade terminals ($3)
- In-line fuse holder ($7)
- 10-amp fuse (50 cents)
Tools
- Soldering iron, solder, solder wick
- Wire stripper, cutters
- Long-nose pliers
- Screwdriver
- Electrical tape
- Xacto knife (or razorblade)
Prepare the repeater
1. Insert the CD for the Linksys WRT54G access point (AP) and follow the instructions for connecting it to your DSL or cable router. Assign an SSID (network name) and WPA pass key using the Setup Wizard.
2. Insert the CD for the Linksys WRE54G Range Expander and follow the instructions for associating it with the AP you set up in Step 1. Do this near the AP; we will move it outdoors once it’s associated.
3. Unplug the Range Expander and remove the power cord from rear of case.
4. Remove the four rubber feet and unscrew the four screws under the feet to pull apart the case.
5. Unclip the main circuit board and power supply board from the bottom half of the case.
6. Remove brown and blue power plugs entering bottom of case.
7. Unplug the black and red wires from the brown power supply board. We will no longer use the power board.
8. De-solder the antenna from the circuit board. Note how the antenna was connected (outer shield to grounding pads, center conductor to signal pad.)
9. Using long nose pliers, unclip the antenna from the top half of the case. We will no longer use that antenna.
10. Feed the DC-to-DC converter plug and the N-female pigtail through the opening you just made by removing the stock antenna. Also feed the pigtail through the opening of the outdoor enclosure.
Install the antenna
11. Strip and prepare the antenna pigtail. Make sure the shield is pulled back from the center conductor and the two are not touching.
12. Solder the antenna pigtail to the circuit board. Solder the shield into place first, then bend the center conductor into place and solder that down. You may wish to use an Xacto knife to expose the copper ground plane to help make a larger surface upon which to solder the outer shield.
13. Use an ohmmeter to ensure the shield is not shorting to the center conductor. Resistance should be infinite between the center conductor and the outer shield.
Prepare charging circuit power
14. Strip the ends of the wires coming from the solar panel, the ends of the cigarette lighter socket, and two lengths of red and black wire. Run the solar panel wires through the opening of the enclosure before soldering.
15. Install a fuse holder and a 10-amp fuse near the negative (-) terminal of the battery.
16. Create a three-way connection between the negative lines and, separately, the positive lines connecting the cigarette lighter socket, the solar panel, and the battery to each other. Remember to always keep positive (red) to positive, and negative (black) to negative. Cover exposed wire with electrical tape to prevent shorts.
17. Switch the DC-to-DC converter to the 3-volt setting. Using a higher voltage may burn out or otherwise damage the repeater.
18. Plug the DC-to-DC converter into the cigarette lighter socket and use a voltmeter to check for power by placing the black lead on the negative (-) terminal of the battery and the red lead on one of the two power ports of the converter. You should see 0 volts on one port and +3 volts on the other. Mark – and + on the connector and unplug the converter for now.
Prepare repeater power
19. Cut the four red and black wires, leaving about 2 inches from the end to the circuit board connector. Strip the ends of all four of them.
20. Twist the black wires together and, separately, twist the red wires together and solder them. (Black to black. Red to red.) You should have one black lead and one red lead.
21. Insert the wires into the DC-to-DC converter and solder them into place. Make sure you put black to the negative (-) side and red to the positive (+) side that you marked in Step 18.
Button up and turn it on
22. Close and screw the case back together.
23. Place the battery at the bottom of the case. Attach the repeater to the inside using tape or Velcro.
24. Ensure the DC-to-DC converter is still set to 3 volts and plug it into the cigarette lighter socket.
25. If everything is connected, the repeater will power on and associate with the AP again (see Step 2). Find a location (away from your sprinklers) to mount the enclosure and antenna. This enclosure is water resistant and should stay dry in the rain, but it’s not waterproof.
26. Mount the solar panel so it is exposed to the sun throughout the day. If you want to be really energy efficient, you can mount the panel so sunlight hits it directly at high noon. For most installations, tilt the panel at a 45-degree angle. If you are located at a latitude higher than 45 degrees from the Earth’s equator, use 60 degrees or more. If you are on the equator, point it straight up at 0 degrees.
Installation tips
- For best coverage, place your home’s wireless router on the ground floor.
- Use a router and range expander that are the same brand to make setup easier.
- Don’t forget to password-protect your network (see your devices’ user manual for instructions).
- Mount the solar panel at around a 45-degree angle. For greatest efficiency, place it in an area of the yard where it will get direct sun at noon.
For more on understanding and preparing cables, pigtails, and connectors, download Chapter 1 (PDF) of Outmesguine’s book Wi-Fi Toys.