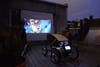
Build a backyard theater
Construct a high-def front projector for hundreds less than store-bought models.
This story has been updated. It was originally featured in the July 2006 issue of Popular Science magazine and involves outdated technologies and services. For current advice, check our product review team’s picks for the best projectors, the best cheap projectors, the best outdoor projectors, or browse their home theater reviews.
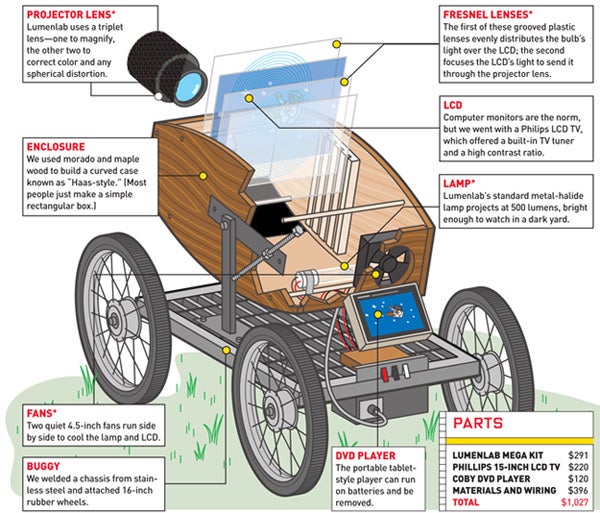
Want some real home theater bragging rights? Instead of buying a projector capable of casting a 14-foot image at 1080p (progressive) resolution—the highest high-definition there is—build one yourself. After all, the front projector’s innards are simple: an LCD lit by a superbright lamp, and a few lenses to magnify and sharpen the image. Retail models start at around $800 and use proprietary $400 lamps that burn out every few years. But cheaper lamps work equally well, and none of the other parts are very expensive. Why not put one together yourself?
That’s the logic that led Grayson Sigler to found Lumenlab three years ago. The company makes and sells kits for DIY projectors with $50 metal-halide lamps that last up to 10 times as long as those in commercial models. And Lumenlab’s forums are the hub of an 11,000-member community that trades tips and tricks, answers newbie questions, and posts photos of their beloved builds.
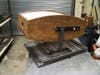
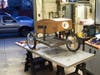
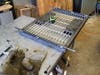
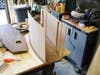
The tradeoff is that Lumenlab projectors are quite a bit larger than store-bought models, which use small LCD screens (the DIY version relies on a disassembled 15-inch computer monitor). Then there’s the considerable elbow grease. Stripping an LCD is delicate work, and you have to carefully construct your own case so the optics line up just right. But the finished box can be mounted anywhere and easily upgraded. Below is a breakdown of how PopSci photographer John Carnett built the one shown here. For an in-depth photo how-to, click here.
- Project: build your own projector
- Cost: $1,027
- Time: 25 hours
- Difficulty: easy | | | | | hard (Editor’s note: 4/5)
Basic instructions
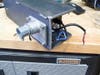
1. Order the Mega Kit from lumenlab.com, which includes everything except the enclosure and the LCD.
2. Consult Lumenlab’s forums for a list of the best 15-inch LCD panels for the project. Find deals at froogle.com.
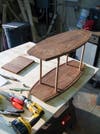
3. Build a case, or browse the forums to find others who will make one for you.
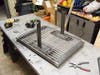
4. Strip the housing and backlight from the LCD, taking care not to rip any cables.
5. Position your lenses in the case to create the correct focal length for the projected image.
6. Add fans, and wire up the electronics.
7. Attach a video source, such as a DVD player or computer, and hit play.
In-depth photo how-to
Although Lumenlab has greatly simplified the LCD projector project with its ready-made parts, it’s still not a job for the DIY newbie. You’ll need carpentry skills to create an enclosure and wiring skills to connect all the parts without electrocuting yourself or burning down your projector. And then there’s the LCD panel stripping—even PopSci photographer John Carnett, a lifetime DIY guy, killed the first LCD TV we sent him.
Lumenlab offers a PDF instruction manual (download here), but it’s more of an overview than a step-by-step guide. The best advice: just comb through the forums at lumenlab.com. You’ll find hundreds of threads discussing the basics, as well as advanced tips and tricks others have learned along the way. To hear Carnett discuss building the PopSci projector—a task that took him more than a week—download our photo podcast (coming soon).
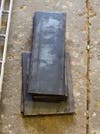

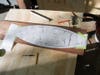
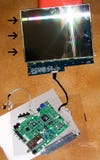
How to ruin an LCD panel, in Carnett’s own words: You’re excited. Slow down. Remember that the panel is the heart and soul of your project—kill it, and no matter how great your woodwork, you got no picture. My mistake was a simple sticker. A Lumenlab forum thread said that the part of the panel that involved high voltage was not required. So when I saw that “high voltage” sticker, I ripped out the part. It turned out that the sticker was on the wrong area; I had ripped off something I really needed. In two seconds of frantic excitement I killed my panel. Take it slow, please. The panel you save could be your own.