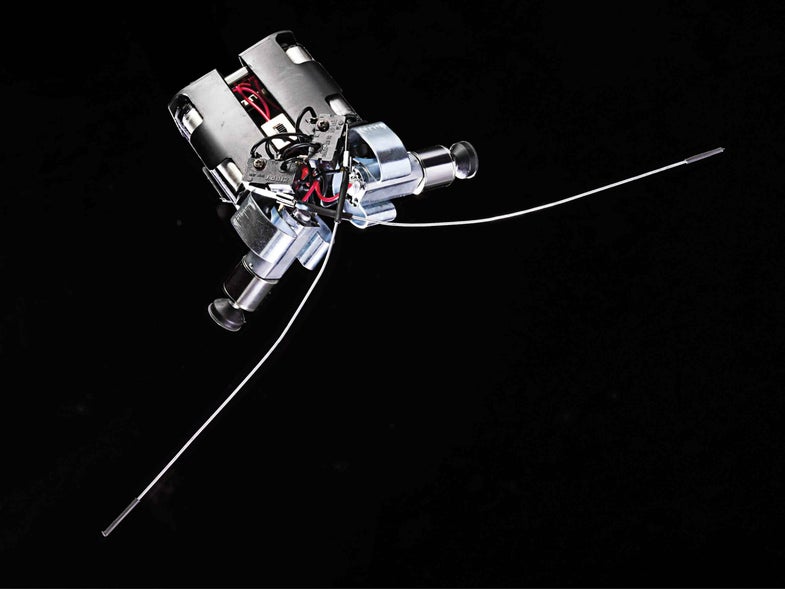
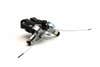
In 1984, Italian neuroscientist Valentino Braitenberg published a book exploring how complex animal behaviors might arise from simple networks of nerves, sense organs, and muscles. That book, Vehicles, inspired a robotics movement now known as BEAM (Biology, Electronics, Aesthetics, Mechanics), which is dedicated to designing simple robots that do complex things. You can build your own BEAM robot with only four switches, two batteries, and two motors. Despite its simplicity, this basic, buglike robot can detect and avoid obstacles, shut down if lifted or flipped, and wake or sleep on command. Watch it in action in the video below.
2 4-40-by-1/8-inch machine screws with matching nuts and split washers
1 snap-action roller switch with 1-inch arm
1 DPDT slideswitch
2 M3 × 10 mm F/F threaded standoffs with four matching screws
2 snap-action lever switches with 1-inch arms
2 No. 2-by-3/8-inch sheet-metal screws
2 3 × AAA flashlight battery cylinders
6 AAA batteries
2 6-32 aluminum rivet nuts
2 DC gear motors, 300 to 600 rpm
2 large paper clips, straightened
2 small female quick-connect lugs
Instructions
Step 1
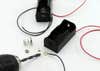
Use a 3/16-inch bit to drill out the battery boxes’ spring rivets. Save the ring terminals and attached wires.
Step 2
Remove the T-nuts’ prongs, put them in the holes, and put a spring clip, faucet washer, and ring terminal on the posts. Secure with 6-32 screws.
Step 3
Pass a 4-40 screw through one box’s bottom corner hole on the end nearest the clip. Temporarily mount the roller switch: Pass this screw through the switch hole farthest from the wheel and secure with a nut. Rotate the switch until its other hole is parallel to the long box edge, and drill a 1/8-inch hole through the plastic below. Solder the four front pins of the slide switch to the roller switch’s C terminal. Solder the red wire to one of its rear pins. Demount the switches. Repeat for the second battery box, but connect its red wire to the opposite pin. Solder two red wires to the roller switch’s NO terminal.
Step 4
Then use 4-40 screws, nuts, and washers to mount the battery boxes back to back with switches in between. Install standoffs at the rear corners.
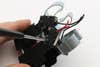
Step 5
Align the lever switches at 90 degrees. Solder their NC terminals together and solder wire between their NO terminals. Mount the switches across the front of the battery boxes with No. 2 screws.
Step 6
Connect one black wire to the NC terminals and the other to the NO terminals. Solder a black wire to each C terminal.
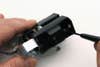
Step 7
Load the flashlight cylinders and pop them into the battery boxes, one facing forward and one backward.
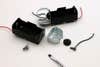
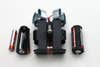
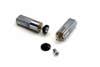
Step 8
Press a faucet washer onto each rivet nut and a rivet nut onto each motor shaft.
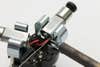
Step 9
Snap the motors into the spring clips and turn on the slide switch. Depress the roller switch. Touch one black lead to one motor terminal on the same side of the robot, and one red lead to the other. If the wheel doesn’t turn forward, reverse red and black. Solder leads. Repeat for both motors.
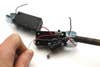
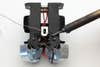
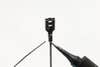
Step 10
Solder the paper clips into quick-connect lugs and bend into “whiskers” that cross ahead of the robot.
Step 11
Slip the lugs over the switch levers.
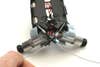
Step 12
Finally, switch on the bot, set it down on a smooth, flat floor, and let it go.
This article was originally published in the May/June 2016 issue of Popular Science, under the title “An Obstacle-Dodging Bug Bot.”