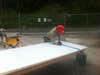
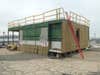
The first step of the flood proof layer installation around the house showing the designed Base Flood Elevation level.SHARE
— We are excited to have started building the SURE HOUSE in a parking lot on the campus of Stevens Institute of Technology in Hoboken New Jersey. “SURE Construction” is a subset of our PopSci blog that we’ll use to chronicle our construction process. Check back often if you want to follow our progress and get a first hand view of how a sustainable and resilient house takes shape.
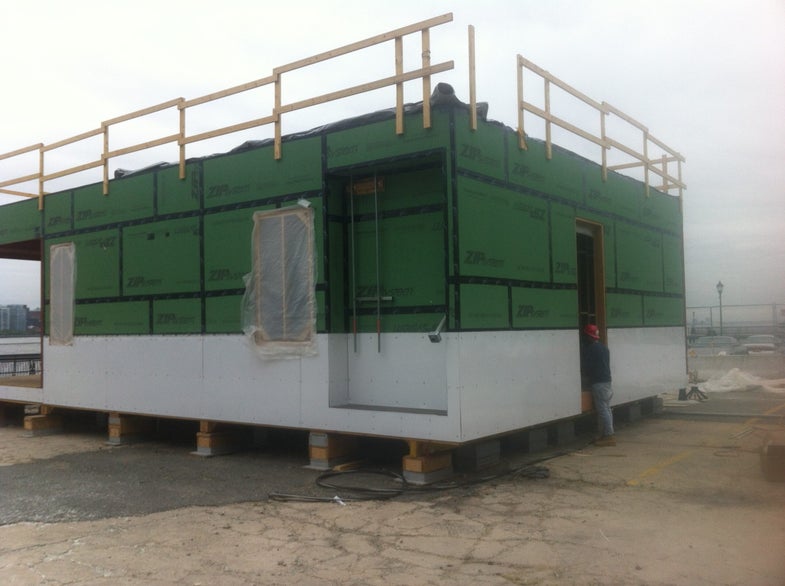
ZIP System Exterior Wall Sheathing
Exterior wall and roof sheathing system that has an integrated water resistant and air barrier. The ZIP System minimizes the building weatherization process to just two steps; ZIP panel installation and ZIP System Taping at the seams. The total system installation process results in a 40% faster installation process and eliminates the need for a house wrap to protect against weather.
ZIP System Exterior Wall Sheathing Taped Joints
Example showing the detail of the ZIP System Tape at the panel seams. The ZIP System tape is a pressure activated tape made of an advanced acrylic adhesive that creates the airtight and watertight seal that completes the weatherization process for the ZIP Wall and Roof Sheathing System.
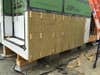
Flood Proof Sheathing Prep
Students prepare flood proof sheathing to be installed over wall sheathing. The flood proof sheathing is an ABS Plastic which creates a continuous barrier around the bottom and sides of the home keeping our home waterproof to the desired design Base Flood Elevation (BFE).
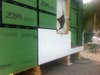
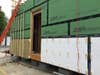
Flood Proof Sheathing Mounted
Flood proof sheathing is fastened to wall sheathing using exterior roofing screws with EPDM washer seal creating a watertight fastening system at each penetration.
Flood Proof Sheathing Prep
Once the flood proof layer is installed, all the seams and edges have to be detailed to create a single continuous watertight barrier around the bottom of the home.All seams are sanded and cleaned in preparation for sealing and taping at all seams and edges.
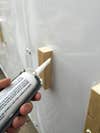
Sealing Flood Proof Sheathing at Joints & Edges
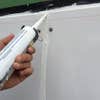
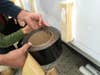
Marine grade sealant is applied to all seams and edges prior to taping to fill in all gaps to eliminate any areas of possible water penetration.
Sealing Flood Proof Sheathing at Joints & Edges
Students applying sealant along seams and and edges.
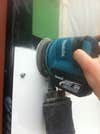
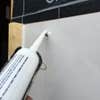
Sealing Flood Proof Sheathing Fasteners
To ensure watertightness, another layer of sealing is done around each individual fastener to keep water from penetrating through our flood proof layer.
Flood Proofing Layer Sheathing Installed
The first step of the flood proof layer installation around the house showing the designed Base Flood Elevation level.
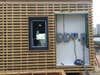
DCIM100GOPROGOPR2469.
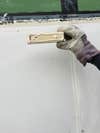
Blocking Detail
In order to create the required blocking to accommodate exterior insulation and ventilated rainscreen cavity, custom wood blocking is installed over the fasteners used for the flood proofing layer. Each wood block is pre drilled and sealed to fit around each roof faster, allowing for the required dimension to accept the exterior insulation panels and creating another layer of watertight sealing each of the fasteners. Each screw that pentrated the wood block and flood proof layer is pre-coated with marine grade sealant and each screw head hole is filled with sealant to fill in any voids in the blocking.
Blocking Detail
All edges are sealed again to ensure there are no areas for water to penetrate to the flood proof layer. The blocking allows for us to also minimize thermal bridging from the vertical and horizontal battens used to hold the cedar shake facade.
Sealing All Seams at Wood Blocking Detail
All edges are sealed again to ensure there are no areas for water to penetrate to the flood proof layer.
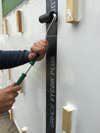
Tape at Flood Proof Sheathing Joints & Edges
Pressure activated tape is applied over all the sealed seams and edges to protect against water, air and moisture penetrations.
Tape at Flood Proof Sheathing Joints & Edges
Pressure activated tape is applied over all the sealed seams and edges to protect against water, air and moisture penetrations.
Exterior Insulation Fit Over Flood Proof Sheathing & Blocking
Exterior rigid insulation is then cut to fit around each wood blocking keeping it in plane with the other pieces of insulation that will be installed above the flood proof layer.
Exterior Insulation Fit Over Flood Proof Sheathing & Blocking
Once insulation is applied over the flood proof sheathing, the wood blocks are used to attach the insulation to the house and accept vertical battens used for the rainscreen system.
Prepping Exterior Insulation For Installation Over Sheathing
To the left side of the house, the bottom row of exterior insulation panels are prepped to fit over the wood blocking. To the right side of the house, the flood proofing visually disappears under the exterior insulation and wood battens.
Final Vertical and Horizontal Battens
Once all insulation is installed vertical battens hold the insulation in place and serve as mounting surfaces for the horizontal battens creating the ventilated cavity for the rainscreen system.