Here’s how I made my fiancé a blinking engagement ring
Build a symbol straight out of Achewood
At the end of 2015, 22-year-old Andrew Martin was celebrating the return of his favorite webcomic Achewood, written by Chris Onstad. The surreal story, which had been on indefinite hiatus since 2011, follows a group of friends (three cats, an otter, a couple bears, and a squirrel) dealing with everyday life: anxiety, aimlessness, and the fear of being found wanting.
Its return inspired Martin, a QA Engineer at Dematic Reddwerks in Austin, TX, to revisit a 2007 storyline in which one of the main characters builds an electronic engagement ring and programs it to blink the date he met his girlfriend. Martin decided to make the ring in real life.
After a long brainstorming session, however, he came to the conclusion that it couldn’t be done. “I did a lot of schematic analysis and I said ‘You know, Onstad had a really good idea with this but I don’t think it’s possible,’” says Martin. So he posted what he’d figured out on an Achewood fan forum and decided to move on.

Andrew Martin
But he had underestimated the “chochachos,” the community of far-flung geeks that loves this webcomic. Their passion comes from an emotional connection to the characters—as a fan commented on a Comics Alliance post about Achewood, “The guys in Achewood are a sort of dysfunctional microcosm of American manhood in the 21st century.”
This dysfunction is a key part of the storyline that introduces the blinky ring. The character Roast Beef, who suffers from depression and anxiety, wants to propose to his girlfriend Molly (a 17th-century Welsh woman who came back to life and got a job at Taco Bell—don’t ask). But shopping for an engagement ring, with all the attendant money woes, politics, expectations, and standards, sends Roast Beef spiraling.
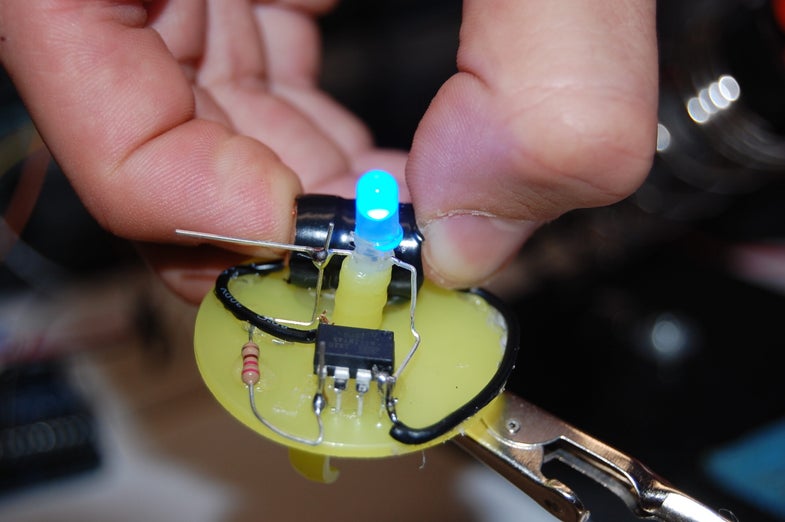
That’s when he decides to make the ring himself. He wires a chip, resistor, and LED together on what looks suspiciously like a Ring Pop base, then programs the ring to blink the date that he and Molly met. Even the plastic base is true to the character—someone who would look down on an inexpensive homemade ring wouldn’t be the partner he was looking for.
“Roast Beef is in his soul a punk, so he wouldn’t go the traditional channel with precious gemstones,” explains Onstad. “This ring also revealed that beneath all his issues he is a romantic: He made a technology-themed ring for a girlfriend he had originally bonded with over technology.”
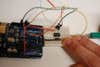
So when Martin decided to reproduce Roast Beef’s ring, it struck a chord with Achewood fans. People stepped up with ideas, friends of friends were consulted, and one commenter suggested that he use a little microcontroller called an ATtiny. That suggestion put a real-life blinky ring back on the table.
And that led to the Sunday afternoon when I sat down with Martin and built my fiancé a ring of his very own. I (the author) actually got engaged while writing this article, so I asked Martin to help me make a blinky ring that would flash the date that my fiancé and I met, just like in the comic. The ring my fiancé gave me has tiny sapphires in it, so I made his DIY version match my more valuable one by using a turquoise LED on top of a gold ring base.

Engaged!
“I really wanted to go forward with the spirit of the comic and say, ‘what can I do in an afternoon with the parts I have lying around the house,’” says Martin. “I could take it in a lot of directions, but I went the Achewood route, where I made it sort of grungy but lived up to the spirit of what the comic was all about.”
He envisions this ring as a good introductory electronics project, with lots of room for improvement and development. DIYers could add an on/off switch (right now you have to manually squeeze the batteries together or use a rubber band). Visually, there are a lot of options, such as 3-D printing a gem shape for the top or embracing a hardware-like aesthetic with a decorative breadboard of some sort. Next time, Martin would like to use flat copper tape and find a circuit base to cover the ring so it looks more like the version pictured in Achewood. Also, more prosaically: next time he knows to bend the wires before gluing stuff down.
The man himself, Onstad, reassured us that our ring was cool and all, but spoke the truth: “Roast Beef would have had a pretty tight game on this and used a smaller-circumference ring base, and special-ordered old school breadboard in green. But yours is personal; that’s what matters.”
On one hand, it’s just an LED on a plastic ring base. On the other, it’s a fan’s ultimate homage to a truly touching love story. On my fiancé’s hand, though, it’s a ring that I made just for him, that blinks the date we met. And that’s pretty rad.
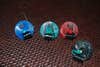
Ring of rings
Build your own blinky ring
Stats
- Time: 1-1.5 hours
- Cost: $10 (but if you buy supplies for several rings, say for a class project, the cost per ring will be closer to $5 or $6)
- Difficulty: Medium
Tools & Materials
- ATtiny85
- Arduino Uno
- 10µF capacitor
- Breadboard
- Computer
- Hot-glue gun
- Clean, dry plastic base from a Ring Pop
- Turquoise LED
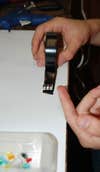
- 3 1.5-volt coin batteries
- Electrical tape
- 220-ohm resistor
- Solid core wires
- Soldering iron and solder
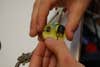
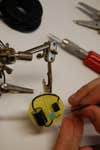
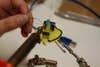
Instructions

Step 1

Step 2
Step 3

Step 4
Step 5

Step 6
Step 7
Step 8
Step 9

Step 10