How To Use Apple Music On MacOS Sierra
Apple continues to integrate Apple Music right into your iTunes Library
We may earn revenue from the products available on this page and participate in affiliate programs. Learn more ›
Here’s our guide on how to use Apple Music on the MacBook series in macOS Sierra version 10.12. For our complete guide to using macOS Sierra, head over here.
Apple Music on your computer
Finally, Apple’s push for online music streaming has found it’s way to your desktop. And it’s very much in line with the redesign that Apple Music got in iOS 10.
If you don’t have Apple Music already, you’ll need to get a subscription first: it costs $9.99 a month, $4.99 a month for students, and $14.99 a month for a family of up to 6 people, each with their own devices.
Cleaner and more user friendly, the new version of Apple Music has stayed consistent between its iPhone app and its larger counterpart. Much like the app, your Mac’s Apple Music now has music curated by AI, its own staff, and outside sources like Rolling Stone, Disney, and even Carnegie Hall. You can discover these under the “Curated Playlists” tab in the “Browse” section of Apple Music.

The Curated Playlist section of Apple Music
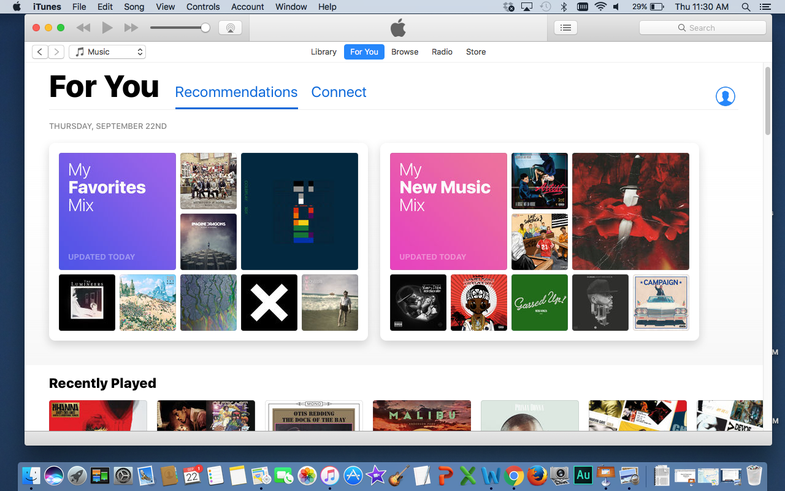
In the “For You” tab, suggested playlists and albums that are both delivered and updated daily to bring new music to your ears. This has suggestions from real editors of the genres you like and from artificial intelligence that scans your preferences and listening habits. You can also use the “Connect” tab to get exclusive information directly from your favorite bands. You can even go in and edit by clicking on the “Find More Artists and Curators” button, expanding the numerous music suggestions Apple Music already makes.

The Connect tab in Apple Music
It’s super user-friendly and easy to navigate, which is helpful for music listening and discovery. You can add whatever music you happen upon to your library simply by clicking on the “…” in the blue circle on the right-hand side of the screen. Click “Add to Library” and it should be available for you, as well as available for download in your iPhone Music app — given that your iCloud account is the same on both.

Add the album you just discovered to your Library
Apple Music’s desktop presence is a huge step at continuing to take on Spotify, considering that Apple Music was difficult before the iOS 10 and macOS updates. The throne for music streaming services is no longer just on mobile devices, the turf has now been expanded to computers.