Wear A Heart (Monitor) On Your Sleeve
Its LEDs will flash a symbol of affection with your every heartbeat
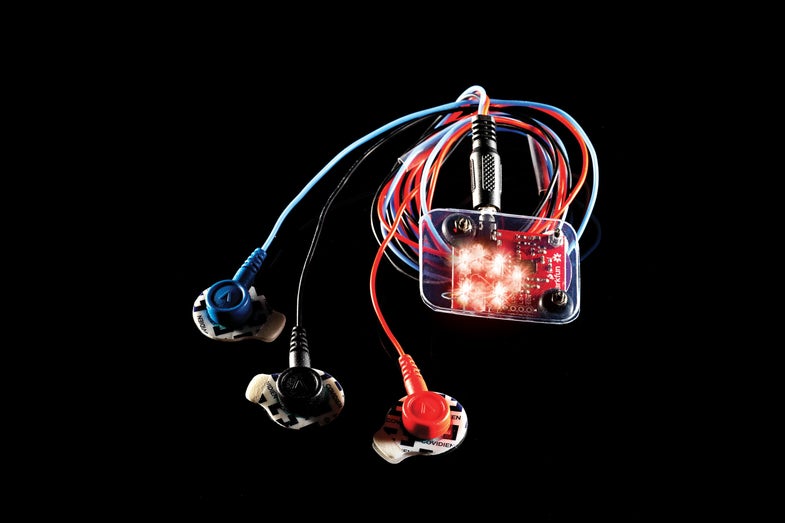
This Valentine’s Day, scrap the overrated roses and chocolate for a more personal token of love. By combining a cardiac monitor with LEDs, you can flash a symbol of affection with each heartbeat.
To contract the heart muscle and pump blood, waves of electricity spread through the organ. Two electrodes on the chest, one on either side of the heart, can pick up these electrical impulses. (A third—often placed on the right leg—increases accuracy.) Heart rate monitors typically feed this data to a screen that shows the signal like an EKG. Instead, you can send it to a heart-shaped LED display that will pulse along with every beat.
Stats
Time: 30 minutes
Cost: $45
Difficulty: 2/5
Materials
- Scrap of stiff clear plastic, 11/8″ x 13/8″
- AD8232 single-lead heart rate monitor
- 7 red LilyPad LED micros
- Glue
- 3 ½-inch 4-40 machine screws and nuts
- 7 ¼-inch round spacers
- LilyPad coin cell battery holder
- 3 sensor pads
- Sensor cable with attached electrodes
- CR2032 coin cell battery
- Sheer sock or stocking
- Safety pins
Tools
- Drill
- Soldering iron
- Screwdriver
Instructions
Place the clear plastic scrap over the heart rate monitor, mark it at three of the four points where there are holes in the monitor, and drill 1/8-inch holes at these marks. Then use a dab of glue to arrange the seven LED micros in a heart shape on the clear plastic. The heart rate monitor’s LED should appear in the center.
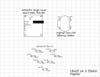
Solder a piece of wire through all of the positive terminals of the LilyPad LED micros, and connect it to the OUTPUT pad on the monitor. Solder another wire through all of the negative terminals and connect it to the GND pad. Follow the wiring diagram below.
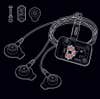
Mount the clear plastic over the monitor with three screws. Slip three spacers around each screw to prevent the plastic from directly touching the heart rate monitor.
Attach the LilyPad coin cell holder to the back of the heart rate monitor with one of the three monitor screws, slipping one spacer between the holder and the monitor. Then solder a wire from the coin cell holder’s positive terminal to the 3.3V pad of the monitor and another wire between the holder’s negative terminal and the GND pad.
Snap a sensor pad onto each cable electrode. Then stick the black electrode on the right pectoral muscle, the blue electrode on the left pectoral muscle, and the red electrode on the upper right leg, just below the waistline.
Slip the battery into the holder. The LEDs should begin flashing in time with your pulse. Stuff the assembly into the sock and fasten it to your sleeve.
Warning: This project is not intended for medical use. If your heart skips a beat, go see your doctor!
This article was originally published in the February 2015 issue of Popular Science, under the title “Wear A Hear On Your Sleeve”.