How to make an LED flashlight
Turn a regular flashlight into a powerful LED torch that will run for years.
We may earn revenue from the products available on this page and participate in affiliate programs. Learn more ›
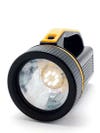
There’s an inherent dilemma in purchasing a flashlight: The really bright and long-lasting LED models are pretty expensive, and the heavy, cheap traditional ones always seem to be dead just when you need them the most. Good thing it’s possible to build your own superbright, reliable, and inexpensive hybrid light.
With a bit of creative circuitry work—you’ll need to add a small circuit called a charge pump to increase the voltage—you can replace the bulb in any cheap lantern-style flashlight with several bright white LEDs. All you need to power your DIY version are three small AA batteries instead of that huge, heavy 6-volt. Plus, LEDs will last far longer than regular flashlight bulbs, so you’ll never be left in the dark.
Stats
- Time: 2 hours
- Cost: $29.29
- Difficulty: easy | | | | | hard (Editor’s note: 3/5)
Parts
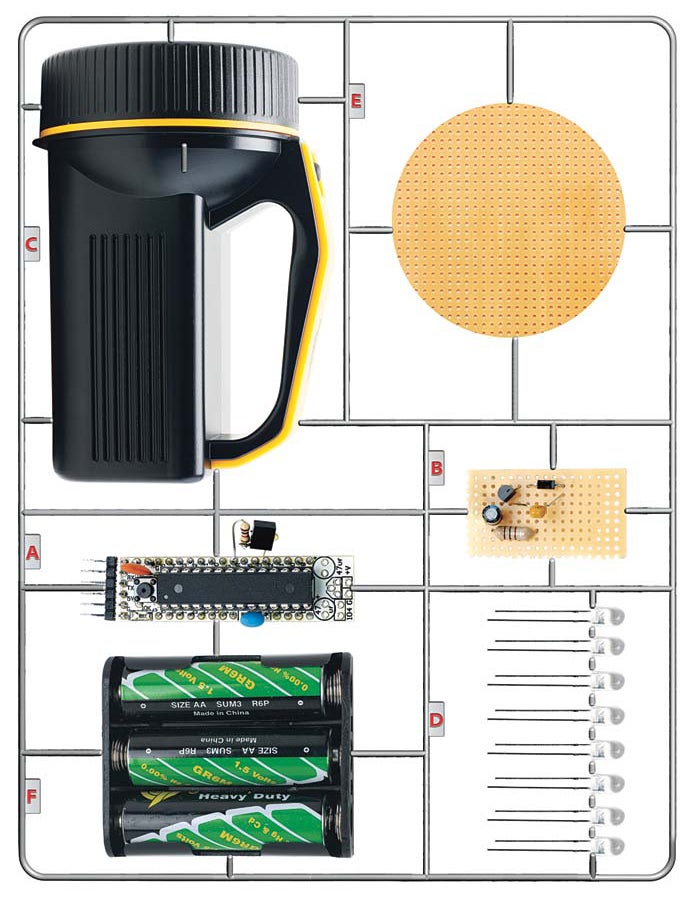
- Flashlight (Harbor Freight Tools #93858; $6.99)
- Rock Bottom Freeduino Kit Plus (Wulfden at Hawk’s Mountain; $12.50)
- 8 white LEDs; 10,000 mcd; 3.3-volt (Mouser #859-LTW-2S3D7; $0.41)
- MOSFET 60-volt 200mA N-Channel (Mouser #863-2N7000RLRPG; $0.28)
- Schottky 1A 40-volt rectifier (Mouser #833-1N5819-TP; $0.18)
- Ceramic capacitor; 1µF; 50-volt (Mouser #581-SR215E105MAR; $0.34)
- Electrolytic capacitor; 22µF; 25-volt (Mouser #647-UVR1E220MDD; $0.18)
- RF Choke; 100µH (Mouser #542-5300-25-RC; $1.01)
- 3-AA-battery holder (Mouser #12BH331-GR; $0.99)
- 2¾-by-6 1/16-inch perfboard (RadioShack #276-1395; $2.79)
- 3 AA batteries (local purchase; $0.25)
- Scrap wire
Instructions
1. Assemble the Freeduino kit.
2. Disassemble the flashlight, remove the incandescent bulb, bulb holder, and reflector.
3. Cut two pieces of perfboard: one circular piece for fitting inside the flashlight’s reflector and another piece for holding the charge pump components. Solder the eight white LEDs in series on the circular perfboard. Assemble the charge pump circuit (see G. Y. Xu article in February 2008 issue of Nuts and Volts).
4. Download and burn our charge pump code (below) onto the Freeduino. Connect the Freeduino (use pin D3) to the charge pump circuit. Connect the charge pump to the serial LED ring. Attach the LED perfboard to the inside of the flashlight reflector.
5. Attach the bulb holder to the reflector and solder the battery holder to the + and – contacts on the back of the bulb holder.
6. Install the three AA batteries and slide the battery holder, Freeduino, and charge pump circuit inside the flashlight and thread the reflector/lens cover back in place.
7. Push the flashlight’s power button and test the circuit. It will take approximately five to 10 seconds for the LEDs to illuminate once power is applied to the circuit. Now you should be able to shed some light on your nocturnal automobile repair.
The code for your Freeduino sketch
_/*  Charge Pump_
_**   13 June 2008_
_**   PopSci.com_
_**   Freeduino Pin_
_**   Pin D3 = output_
_*/_

_// Freeduino Pin D3 for output_

**int** pumpPin = 3;

**void** setup() {

  **pinMode**(pumpPin, OUTPUT);

}

**void** loop() {

_// Set Pin D3 for full output_
  **digitalWrite**(pumpPin, HIGH);

_// Pause for 7 microseconds_
  **delayMicroseconds**(7);

_// Turn Pin D3 OFF_
**digitalWrite**(pumpPin, LOW);

}
This story has been updated. It was originally featured in the September 2008 issue of Popular Science magazine.