Adding a Touchscreen Interface to a DIY Project
“Resistive” touchscreens are the type you’re most likely to use in a DIY microcontroller project. These consist of two screen...
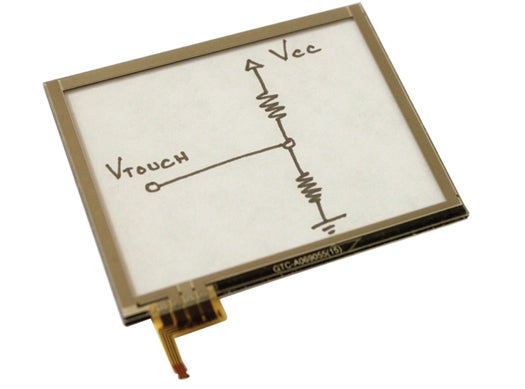
“Resistive” touchscreens are the type you’re most likely to use in a DIY microcontroller project. These consist of two screen layers coated with a resistive material and separated by a small gap. When touched, the layers make contact, creating a voltage divider circuit. The resulting voltage is easily measured and correlated to position. The top layer of the touchscreen is just a clear overlay, though; what really makes it work is the layer underneath. Approaches to implementing a screen range from putting a printed sheet behind a touchscreen for a static touch interface—actually a fairly simple method to pull off—to something as full-featured as an LCD smartphone display. Here are the three main options.
EASY
For flexibility in your choice of interface, buy just the screen. Nintendo DS Lite touchscreens are easy to use, and available for less than $10 from sites such as Adafruit and Sparkfun, but they leave the underlying layer up to you.
Adafruit’s TFT LCD Touchscreen
MODERATE
For ease of use, pick a screen and display combination such as the one from Adafruit ($40). It’s fairly inexpensive but could tax your microcontroller, since it has to manage the graphics in addition to whatever else it does in the project.
ADVANCED
For a more sophisticated interface, use a screen and display combination with its own processor, which reduces the load on the project’s main microcontroller. Many sub-$200 options exist, such as Liquidware’s TouchShields (about $140 at Liquidware)